

In iOS 14, Apple introduced a lot of new additions to the SwiftUI framework like LazyVGrid and LazyHGrid. But matchedGeometryEffect is the new one that really caught my attention because it allows developers to create some amazing view animations with a few lines of code. The SwiftUI framework already makes it easy for developers to animate changes of a view. The matchedGeometryEffect modifier just takes the implementation of view animations to the next level.
For any mobile apps, it is very common that you need to transit from one view to another. Creating a delightful transition between views will definitely improve the user experience. With matchedGeometryEffect, all you need is describe the appearance of two views. The modifier will then compute the difference between those two views and automatically animates the size/position changes.
Feeling confused? No worries. You will understand what I mean after going through the demo apps.
Editor’s Note: This is an excerpt of our Mastering SwiftUI book. To dive deeper into SwiftUI animation and learn more about the SwiftUI framework, you can check out the book here.
Revisiting SwiftUI Animation
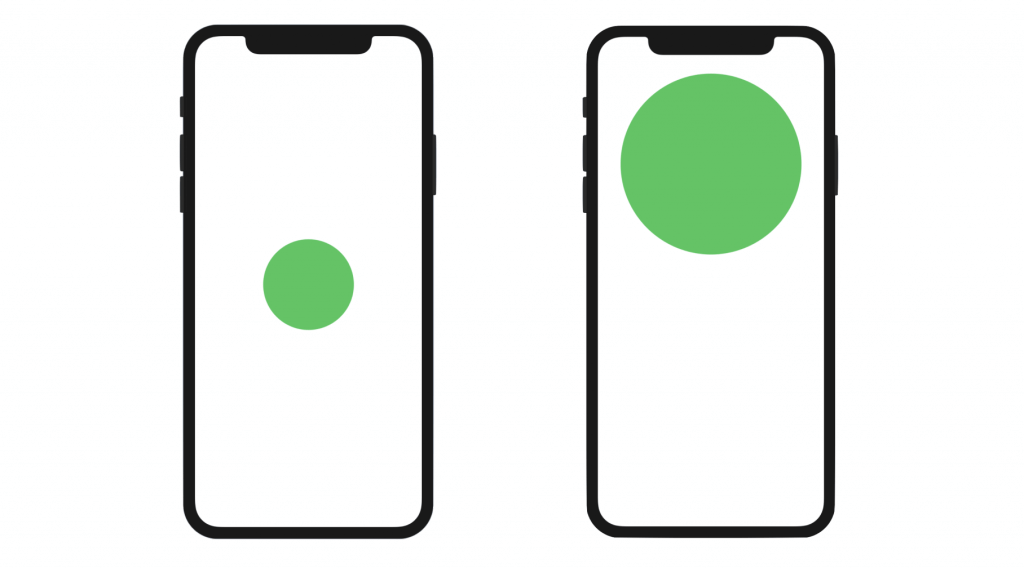
Before I walk you through the usage of matchedGeometryEffect, let’s take a look at how we implement animation using SwiftUI. The figure below shows the beginning and final states of a view. When you tap the circle view on your left, it should grow bigger and move upward. Conversely, if you tap the one on the right, it returns to the original size and position.
The implementation of this tappable circle is very straightforward. Assuming you’ve created a new SwiftUI project, you can update the ContentView struct like this:
struct ContentView: View {

    @State private var expand = false

    var body: some View {
        Circle()
            .fill(Color.green)
            .frame(width: expand ? 300 : 150, height: expand ? 300 : 150)
            .offset(y: expand ? -200 : 0)
            .animation(.default)
            .onTapGesture {
                self.expand.toggle()
            }
    }
}
We have a state variable expand to keep track of the current state of the Circle view. In both the .frame and .offset modifiers, we vary the frame size and offset when the state changes. If you run the app in the preview canvas, you should see the animation when you tap the circle.
Understanding the matchedGeometryEffect Modifier
So, what is matchedGeometryEffect? How does it simplify the implementation of the view animation? Take a look at the first figure and the code of the circle animation again. We have to figure out the exact value change between the start and the final state. In the example, they are the frame size and the offset.
With the matchedGeometryEffect modifier, you no longer need to figure out these differences. All you need to do is describe two views: one represents the start state and the other is for the final state. matchedGeometryEffect will automatically interpolate the size and position between the views.
To create the same animation as shown earlier with matchedGeometryEffect, you can first declare a namespace variable:
@Namespace private var shapeTransitionAnd then, rewrite the body part like this:
var body: some View {
    if expand {

        // Final State
        Circle()
            .fill(Color.green)
            .matchedGeometryEffect(id: "circle", in: shapeTransition)
            .frame(width: 300, height: 300)
            .offset(y: -200)
            .animation(.default)
            .onTapGesture {
                self.expand.toggle()
            }

    } else {

        // Start State
        Circle()
            .fill(Color.green)
            .matchedGeometryEffect(id: "circle", in: shapeTransition)
            .frame(width: 150, height: 150)
            .offset(y: 0)
            .animation(.default)
            .onTapGesture {
                self.expand.toggle()
            }
    }
}
In the code, we created two circle views: one is for the start state and the other is for the final state. When it’s first initialized, we have a Circle view which is centered and has a width of 150 points. When the expand state variable is changed from false to true, the app displays another Circle view which is positioned 200 points from the center of the screen and has a width of 300 points.
For both Circle views, we attach the matchedGeometryEffect modifier and specify the same ID & namespace. By doing so, SwiftUI computes the size & position difference between these two views and interpolates the transition. Along with the animation modifier, the framework will automatically animate the transition.
The ID and namespace are used for identifying which views are part of the same transition. This is why both Circle views use the same ID and namespace.
This is how you use matchedGeometryEffect to animate transition between two views. If you’ve used Magic Move in Keynote before, this new modifier is very much like Magic Move. To test the animation, I suggest you to run the app in an iPhone simulator. At the time of this writing, it seems there is a bug in Xcode 12 that you can’t test some of the animation properly in the preview canvas.
Morphing From a Circle to a Rounded Rectangle
Let’s try to implement another animated view transition. This time, we will morph a circle into a rounded rectangle. The circle is positioned to the top of the screen, while the rounded rectangle is close to the bottom part of the screen.
By using the same technique you learned earlier, you just need to prepare two views: the circle view and the rounded rectangle view. The matchedGeometryEffect modifier will then handle the transformation. Now replace the body variable of the ContentView struct like this:
VStack {
    if expand {

        // Rounded Rectangle
        Spacer()

        RoundedRectangle(cornerRadius: 50.0)
            .matchedGeometryEffect(id: "circle", in: shapeTransition)
            .frame(minWidth: 0, maxWidth: .infinity, maxHeight: 300)
            .padding()
            .foregroundColor(Color(.systemGreen))
            .animation(.easeIn)
            .onTapGesture {
                expand.toggle()
            }

    } else {

        // Circle
        RoundedRectangle(cornerRadius: 50.0)
            .matchedGeometryEffect(id: "circle", in: shapeTransition)
            .frame(width: 100, height: 100)
            .foregroundColor(Color(.systemOrange))
            .animation(.easeIn)
            .onTapGesture {
                expand.toggle()
            }

        Spacer()
    }
}
We still make use of the expand state variable to toggle between the circle view and the rounded rectangle view. The code is very similar to the previous example, except that we use a VStack and a Spacer to position the view. You may wonder why we use RoundedRectangle to create the circle. The main reason is that it will give you a more smooth transition.
For both views, we attach the matchedGeometryEffect modifier and specify the same ID & namespace. That’s all we need to do. The modifier will compare the difference between these two views and animate the changes. If you run the app in the preview canvas or on an iPhone simulator, you will see a nice transition between the circle and the rounded rectangle views. This is the magic of matchedGeometryEffect.
However, you may notice that the modifier doesn’t animate the color change. This is right. matchedGeometryEffect only handles the position and size changes.
Exercise #1
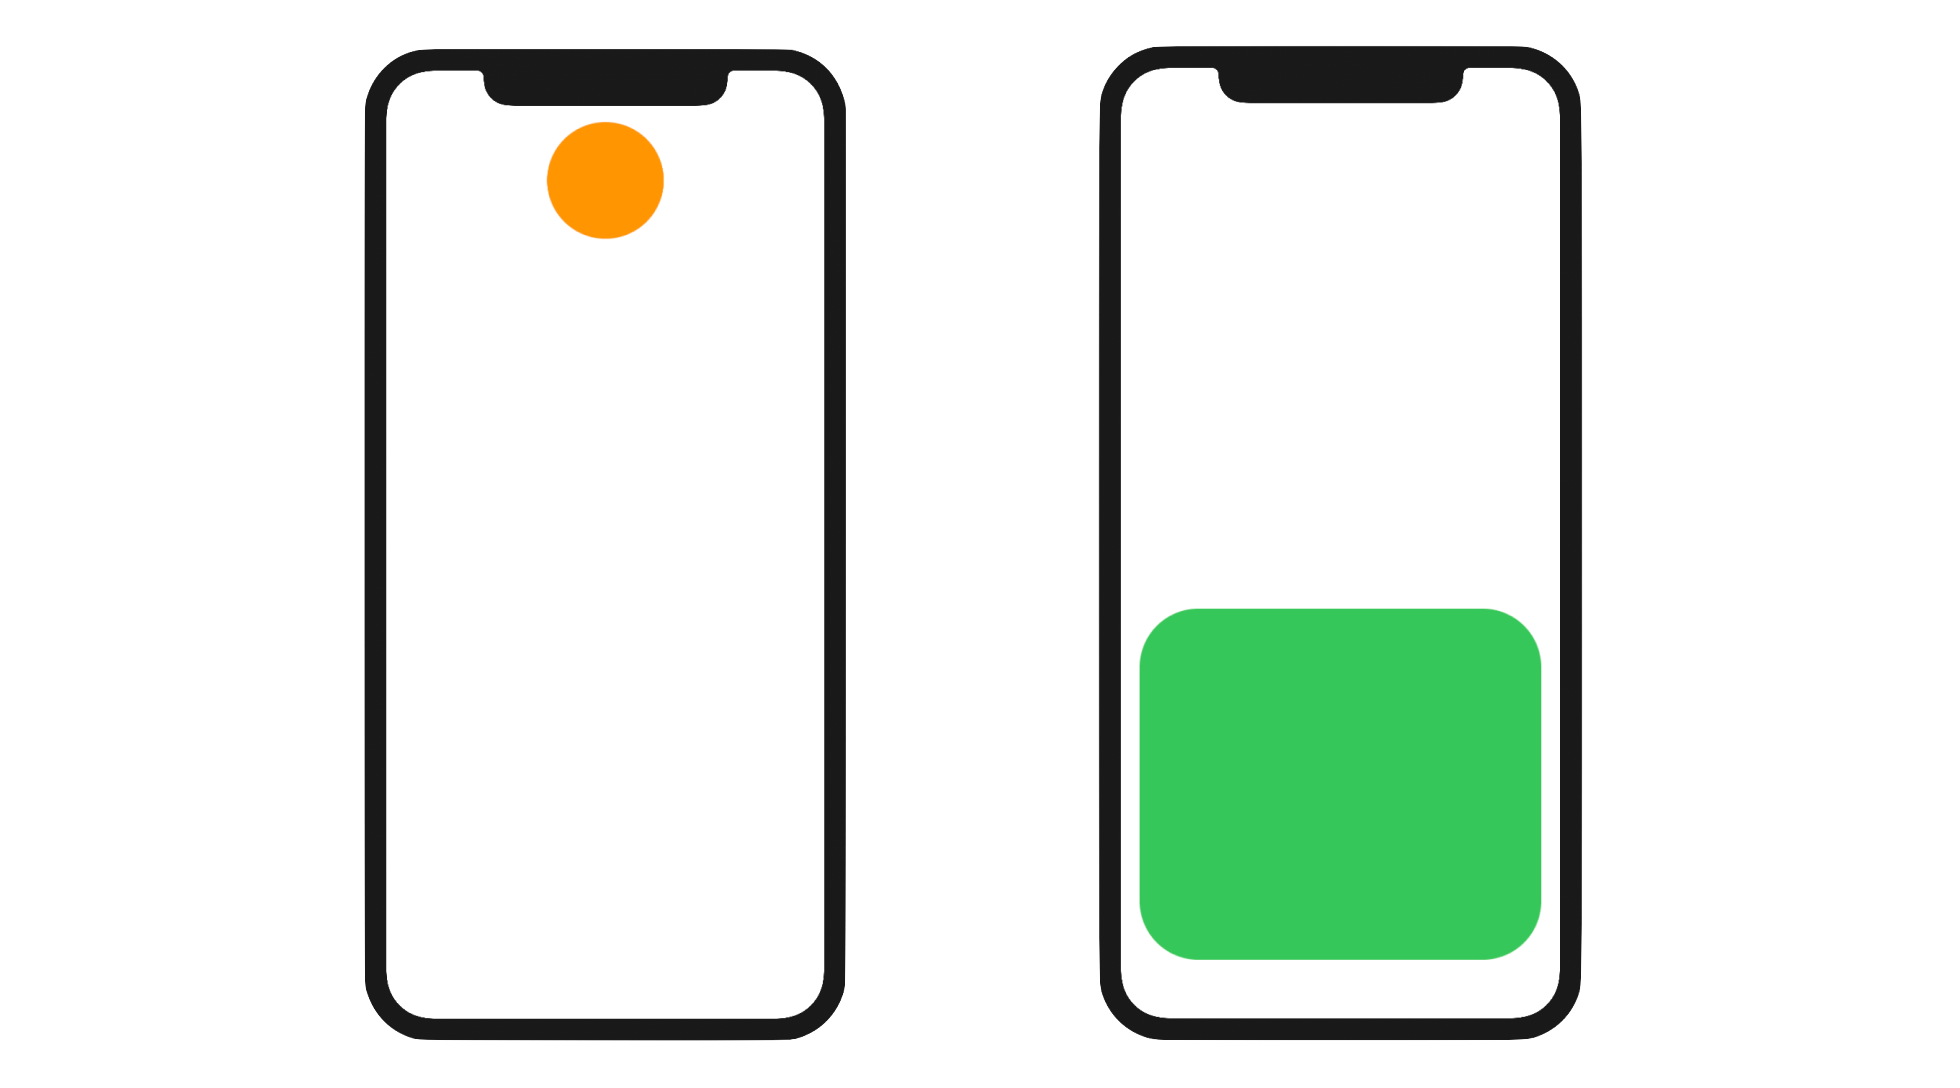
Let’s have a simple exercise to test your understanding of matchedGeometryEffect. Your task is to create the animated transition as shown in the figure below. It starts with an orange circle view. When the circle is tapped, it will transform into a full screen background. You can find the solution in the final project.
Swapping Two Views with Animated Transition
Now that you should have some basic knowledge of matchedGeometryEffect, let’s continue to see how it can help us create some nice animations. In this example, we will swap the position of two circle views and apply the modifier to create a smooth transition.
We will use a state variable to store the state of the swap and create a namespace variable for matchedGeometryEffect. Declare the following variable in ContentView:
@State private var swap = false

@Namespace private var dotTransition
By default, the orange circle is on the left side of the screen, while the green circle is positioned on the right. When the user taps any of the circles, it will trigger the swap. You don’t need to figure out how the swap is done when using matchedGeometryEffect. To create the transition, all you need to do is:
- Create the layout of the orange and green circles before the swap
- Create the layout of the two circles after the swap
If you translate the layout into code, you can write the body variable like this:
if swap {

    // After swap
    // Green dot on the left, Orange dot on the right

    HStack {
        Circle()
            .fill(Color.green)
            .frame(width: 30, height: 30)
            .matchedGeometryEffect(id: "greenCircle", in: dotTransition)

        Spacer()

        Circle()
            .fill(Color.orange)
            .frame(width: 30, height: 30)
            .matchedGeometryEffect(id: "orangeCircle", in: dotTransition)
    }
    .frame(width: 100)
    .animation(.linear)
    .onTapGesture {
        swap.toggle()
    }

} else {

    // Start state
    // Orange dot on the left, Green dot on the right

    HStack {
        Circle()
            .fill(Color.orange)
            .frame(width: 30, height: 30)
            .matchedGeometryEffect(id: "orangeCircle", in: dotTransition)

        Spacer()

        Circle()
            .fill(Color.green)
            .frame(width: 30, height: 30)
            .matchedGeometryEffect(id: "greenCircle", in: dotTransition)
    }
    .frame(width: 100)
    .animation(.linear)
    .onTapGesture {
        swap.toggle()
    }
}
We use a HStack to layout the two circles horizontally and have a Spacer in between to create some separation. In case the swap variable is set to true, the green circle is placed to the left of the orange circle. Conversely, the green circle is positioned to the right of the orange circle.
As you can see, we just describe the layout of the circle views in difference states and let matchedGeometryEffect handle the rest. We attach the modifier to each of the Circle view. However, this time is a bit different. Since we have two different Circle views to match, we use two distinct IDs for the matchedGeometryEffect modifier. For the orange circles, we set the identifier to orangeCircle, while the green circles use the identifier greenCircle.
Now if you run the app on a simulator, you should see the swap animation when you tap any of the circles.
Exercise #2
Earlier, we use the matchedGeometryEffect on two circles and swap their position. Your exercise is to apply the same technique but on two images. The figure below shows you the sample UI. When the swap button is tapped, the app swaps the two photos with a nice animation.
You are free to use your own photos. For my demo, I used these free photos from Unsplash.com:
Summary
The introduction of the matchedGeometryEffect modifier takes the implementation of view animation to the next level. You can create some nice view transitions with much less code. Even if you are a beginner of SwiftUI, you can take advantage of this new modifier to make your app more awesome.
This is a sample chapter of our Mastering SwiftUI book. If you want to learn more about various types of view animation and get the source code, you can check out the book, which has been fully updated for Xcode 12 and iOS 14.


