Chapter 17
Working with AirDrop, UIActivityViewController and Uniform Type Identifiers
AirDrop is Apple's answer to file and data sharing. Prior to iOS 7, users had to rely on third-party apps like Bump to share files between iOS devices. Since the release of iOS 7, iOS users are allowed to use a feature called AirDrop to share data with nearby iOS devices. In brief, the feature allows you to share photos, videos, contacts, URLs, Passbook passes, app listings on the App Store, media listings on iTunes Store, location in Maps, etc.
Wouldn't it be great if you could integrate AirDrop into your app? Your users could easily share photos, text files, or any other type of document with nearby devices. The UIActivityViewController class bundled in the iOS SDK makes it easy for you to embed AirDrop into your apps. The class shields you from the underlying details of file sharing. All you need to do is tell the class the objects you want to share and the controller handles the rest. In this chapter, we'll demonstrate the usage of UIActivityViewController and see how to use it to share images and documents via AirDrop.
To activate AirDrop, simply bring up Control Center and tap AirDrop. Depending on whom you want to share the data with, you can either select Contact Only or Everyone. If you choose the Contact Only option, your device will only be discovered by people listed in your contacts. If the Everyone option is selected your device can be discovered from any other device.
AirDrop uses Bluetooth to scan for nearby devices. When a connection is established via Bluetooth, it will create an ad-hoc Wi-Fi network to link the two devices together, allowing for faster data transmission. This doesn't mean you need to connect the devices to a Wi-Fi network in order to use AirDrop; your WiFi just needs to be on for the data transfer to occur.
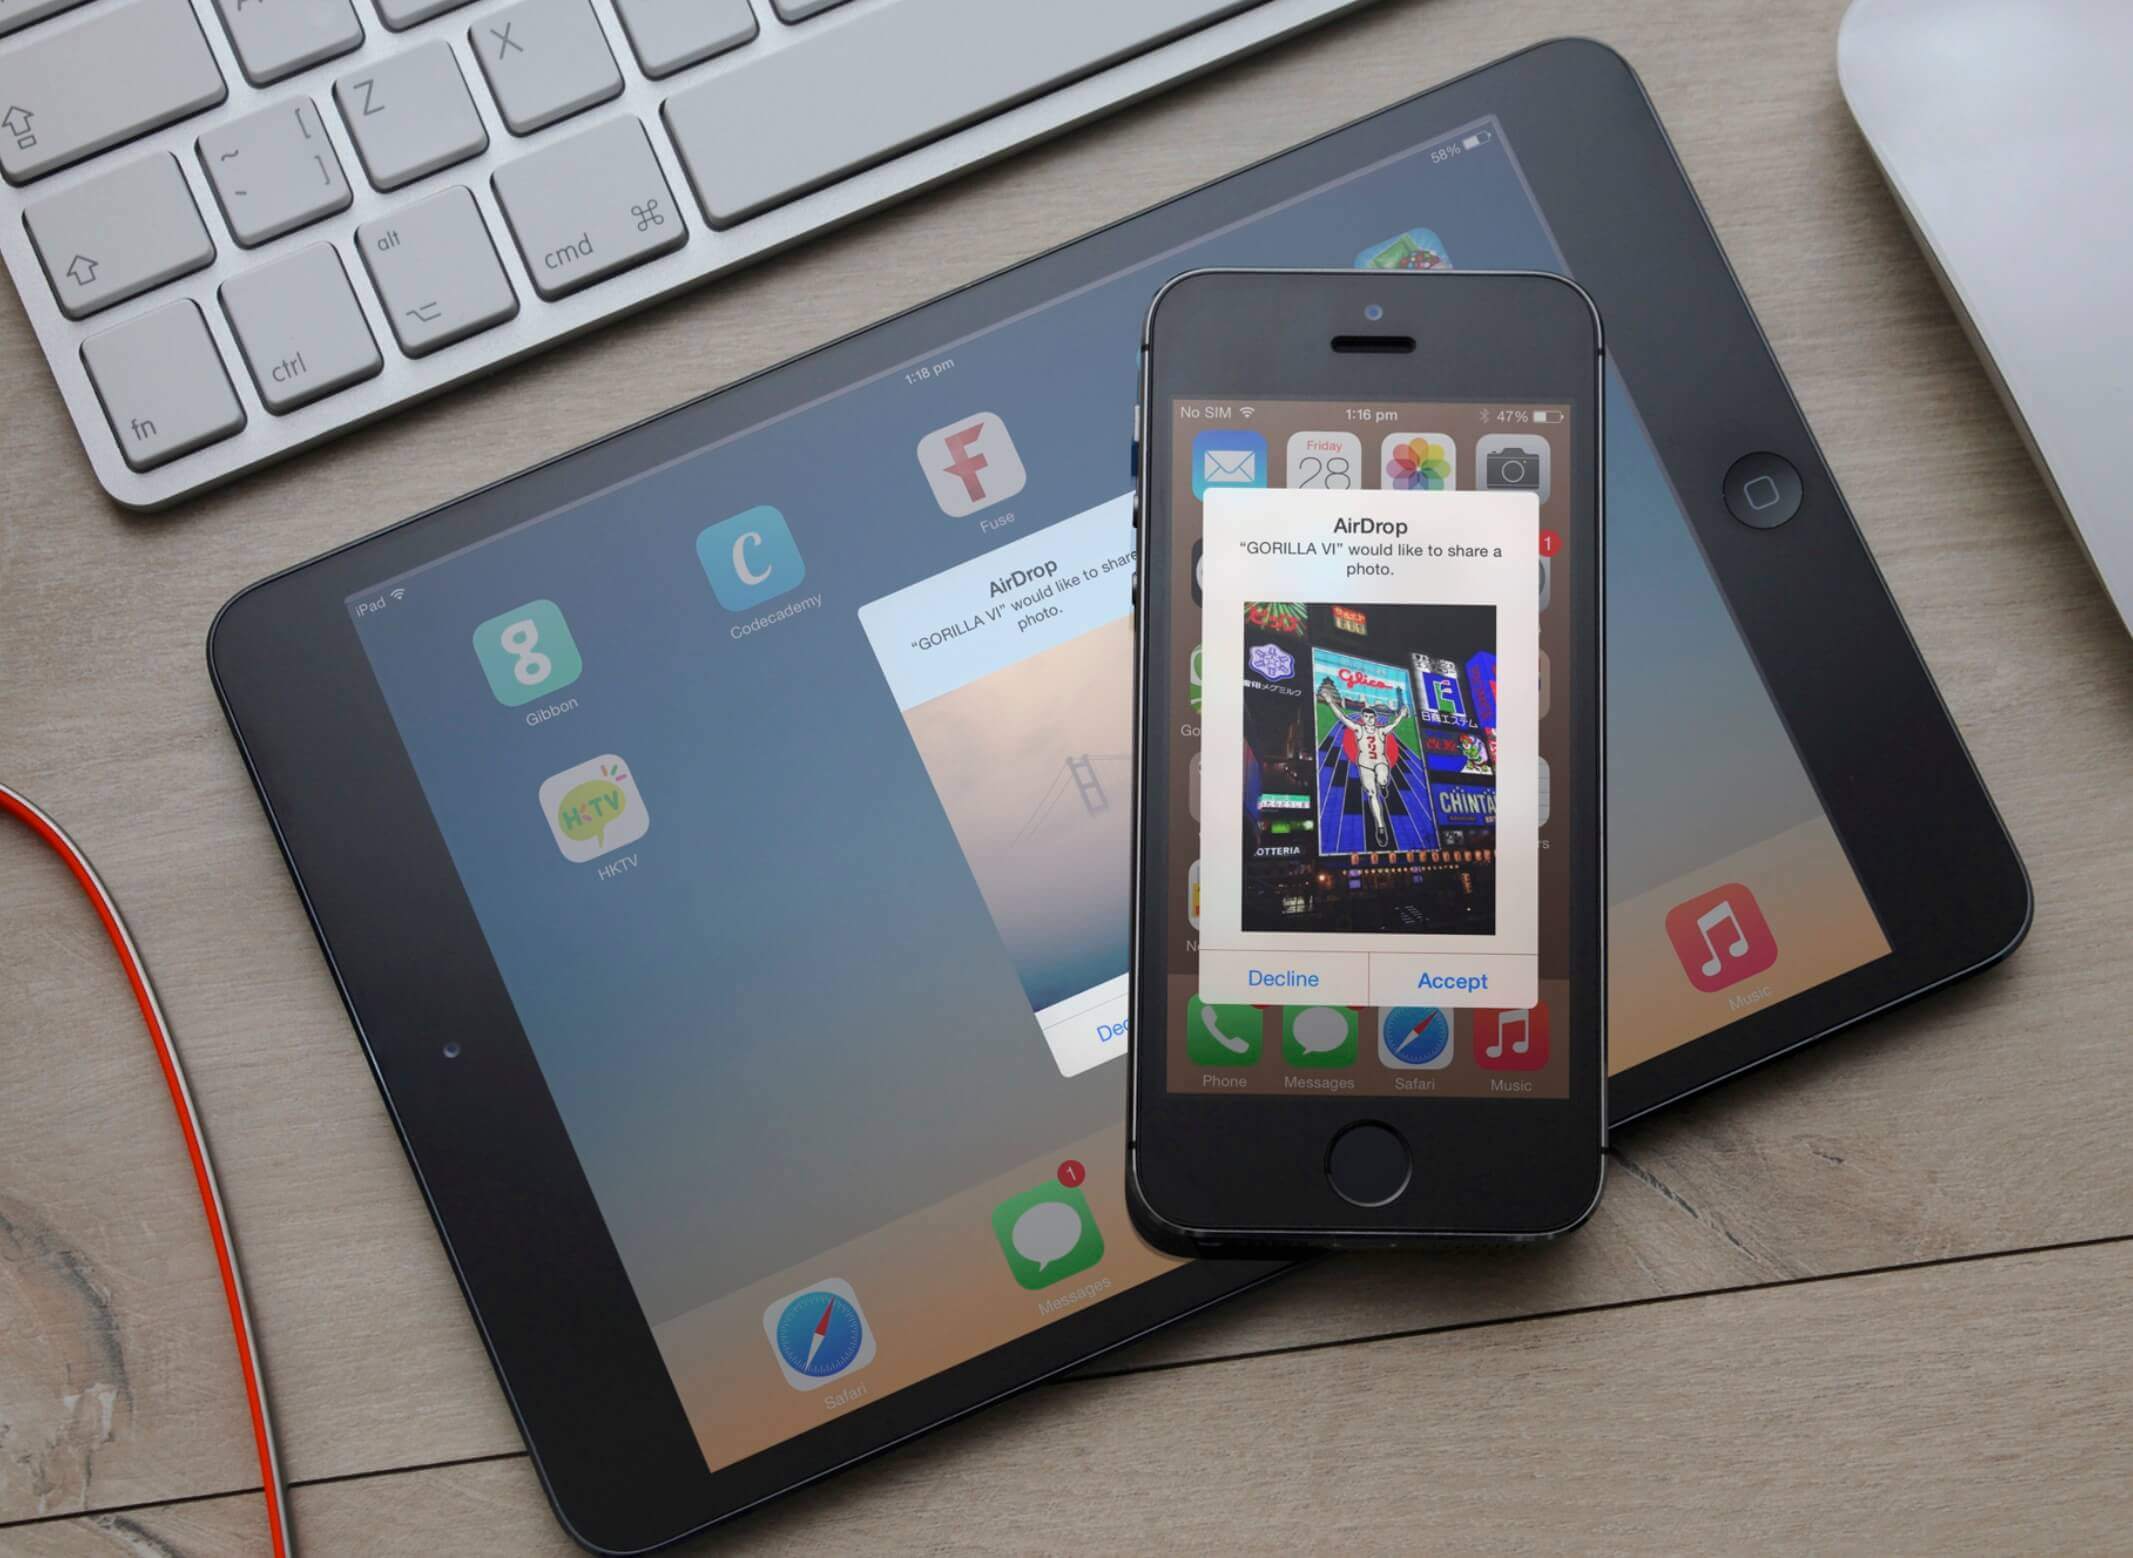
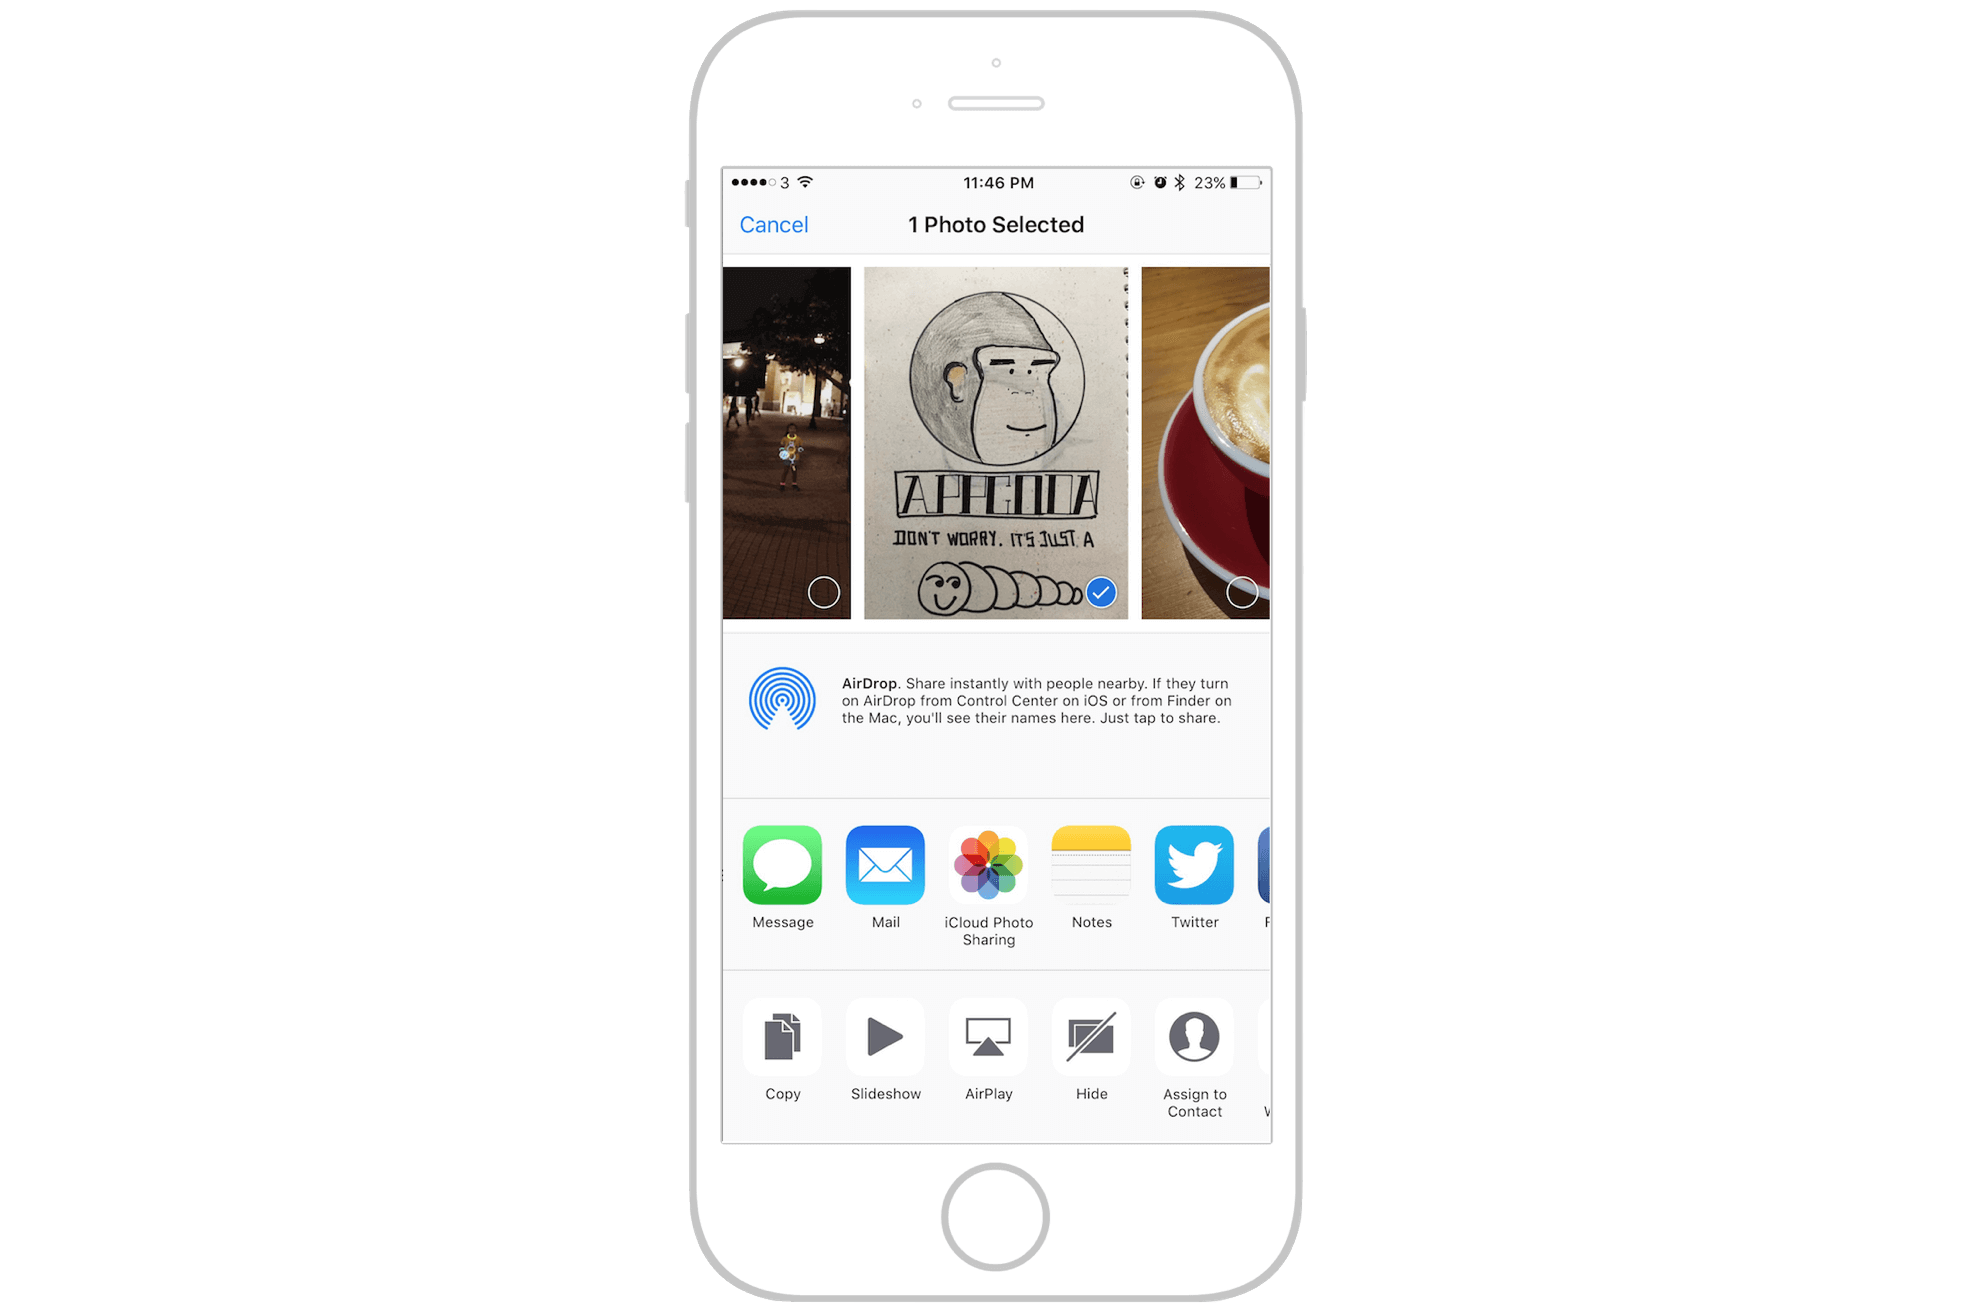
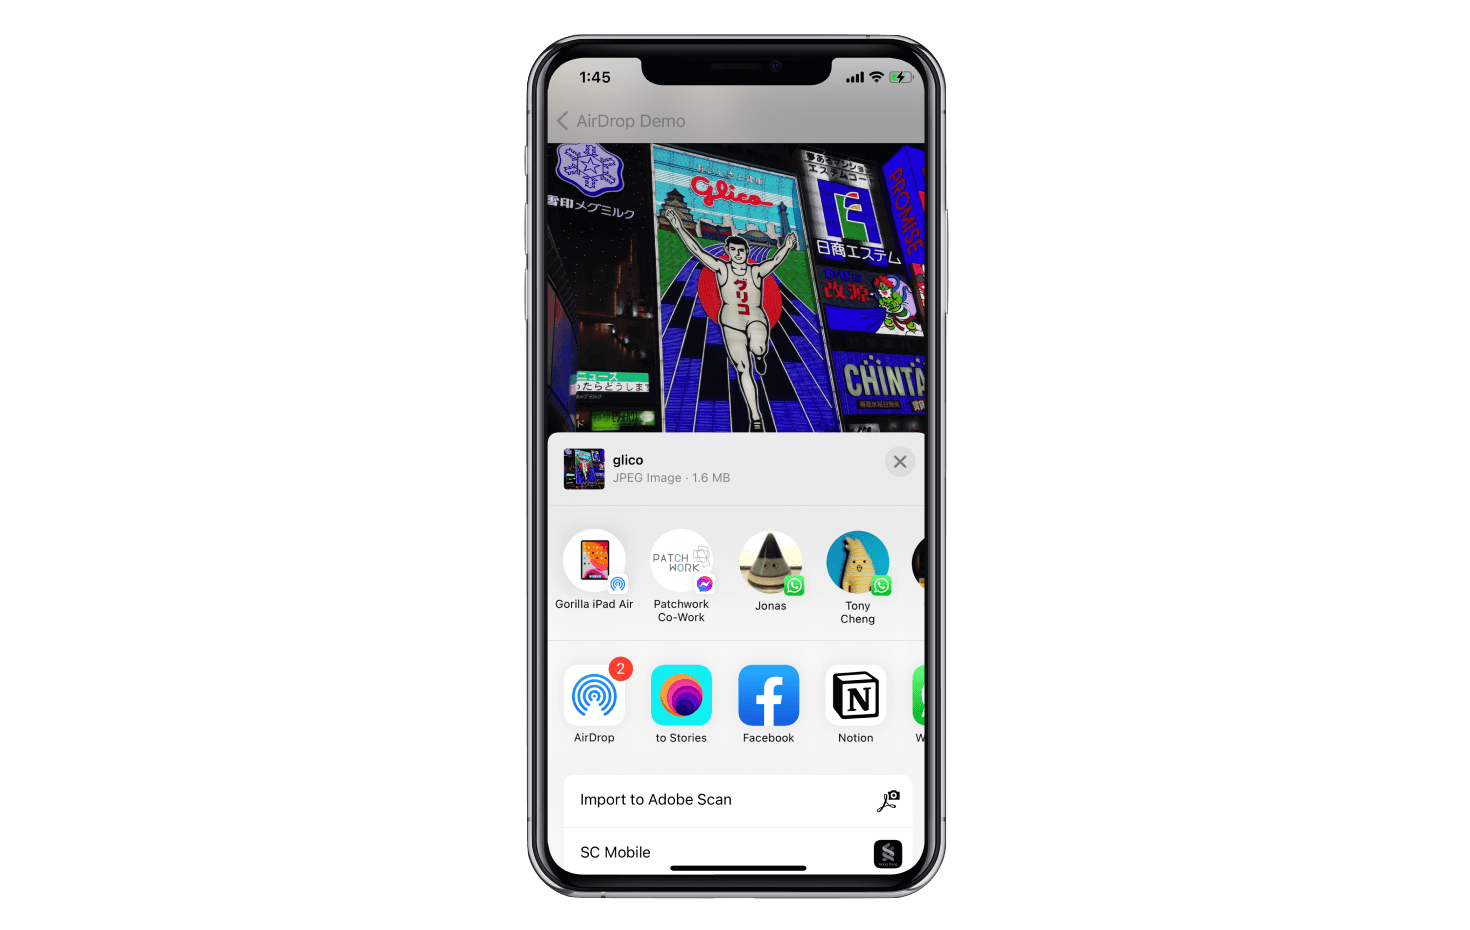
For example, let's say you want to transfer a photo in the Photos app from one iPhone to another. Assuming you have enabled AirDrop on both devices, you can share the photo with another device by tapping the Share button (the one with an arrow pointing up) in the lower-left corner of the screen.
Within the AirDrop area, you will find the names of devices eligible for sharing. It's important to note that AirDrop is unavailable when the screen is turned off, so ensure that the receiving device is powered on. Once confirmed, you can select the specific device you wish to share the photo with. On the receiving device, a preview of the photo and a confirmation request will be displayed. The recipient has the option to accept or decline the image. If they choose to accept, the photo will be transferred and automatically saved to their camera roll.
AirDrop doesn't just work with the Photos app. You can also share items in your Contacts, iTunes, App Store, and Safari browser, to name a few. If you're new to AirDrop, you should now have a better idea of how it works.
Let's see how we can integrate AirDrop into an app to share various types of data.
UIActivityViewController Overview
You might think that it would take a hundred lines of code to implement the AirDrop feature. Conversely, you just need a few lines of code to embed AirDrop. The UIActivityViewController class provided by the UIKit framework streamlines the integration process.
The UIActivityViewController class is a standard view controller that provides several standard services, such as copying items to the clipboard, sharing content to social media sites, sending items via Messages, etc. Since iOS 7, the class added the support of AirDrop sharing. Now the activity view controller further added the support of app extensions. However, we will not discuss it in this chapter.
The class is very simple to use. Let's say you have an array of objects to share using AirDrop. All you need to do is create an instance of UIActivityViewController with the array of objects and then present the controller on the screen. Here is the code snippet:
let objectsToShare = [fileURL]
let activityController = UIActivityViewController(activityItems: objectsToShare, applicationActivities: nil)
present(activityController, animated: true, completion: nil)
As you can see, with just three lines of code you can bring up an activity view with the AirDrop option. Whenever there is a nearby device detected, the activity controller automatically displays the device and handles the data transfer if you choose to share the data. By default, the activity controller includes sharing options such as Messages, Flickr and Sina Weibo. Optionally, you can exclude these types of activities by setting the excludedActivityTypes property of the controller. Here is the sample code snippet:
let excludedActivities = [UIActivity.ActivityType.postToWeibo, UIActivity.ActivityType.message, UIActivity.ActivityType.postToTencentWeibo]
activityController.excludedActivityTypes = excludedActivities
You can use UIActivityViewController to share different types of data including String, UIImage, and URL. Not only you can use URL to share a link, but it also allows developers to transfer any type of files by using the file URL.
When the other device receives the data, it will automatically open an app based on the data type. So, if a UIImage object is transferred, the received image will be displayed in the Photos app. When you transfer a PDF file, the other device will open it in Safari. If you just share a String object, the data will be presented in the Notes app.
Demo App
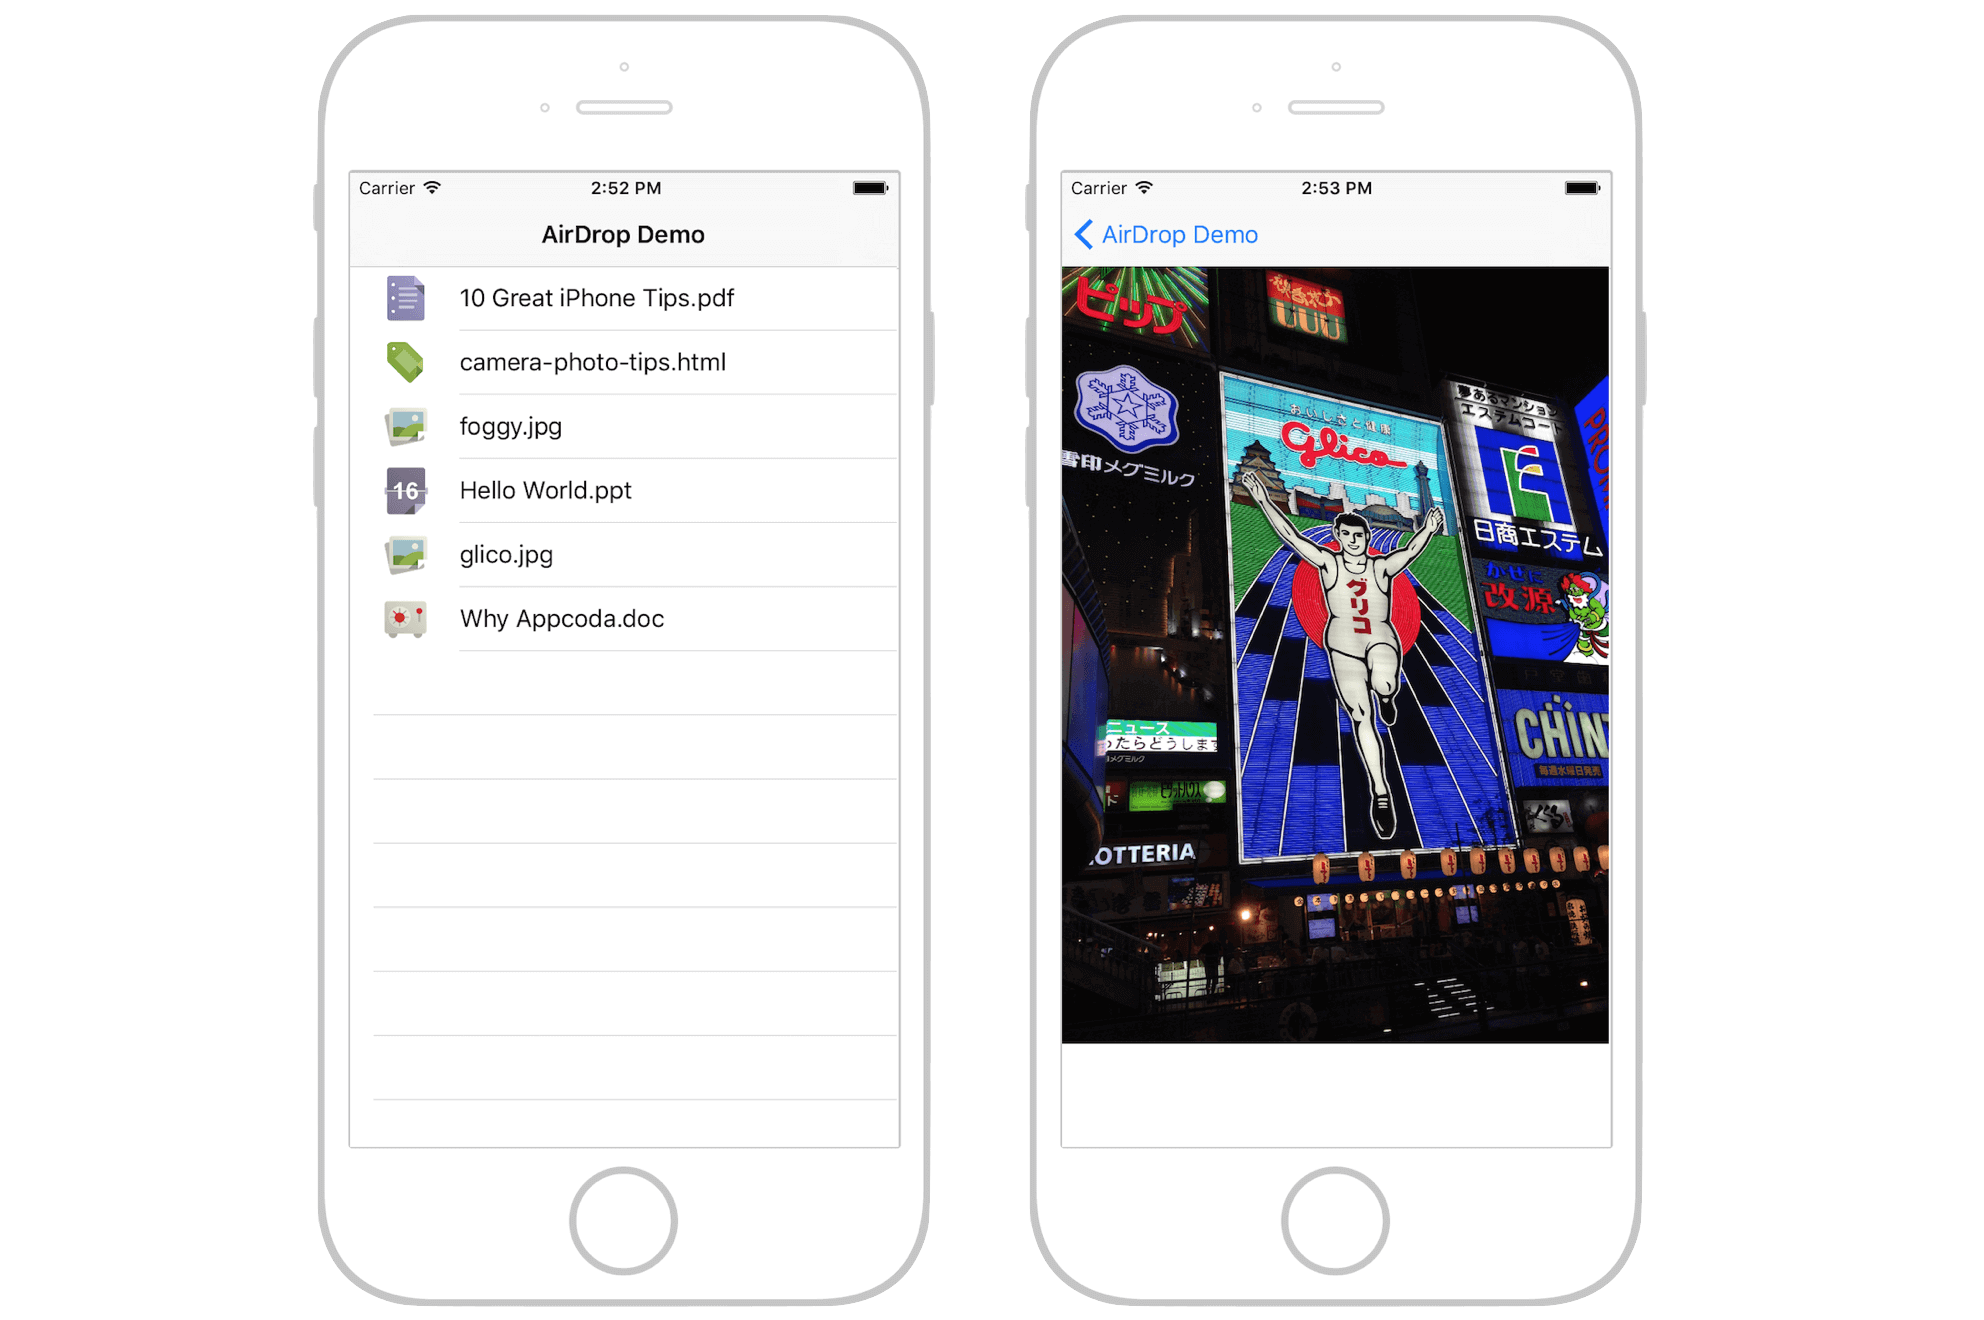
To give you a better idea of UIActivityViewController and AirDrop, we'll build a demo app as usual. Once again, the app is very simple. When it is launched, you'll see a table view listing a few files including image files, a PDF file, a document, and a Powerpoint. You can tap a file and view its content in the detail view. In the content view, there is a toolbar at the bottom of the screen. Tapping the Share action button in the toolbar will bring up the AirDrop option for sharing the file with a nearby device.
To keep you focused on implementing the AirDrop feature, you can download the project template from http://www.appcoda.com/resources/swift59/AirDropDemoStarter.zip. After downloading the template, open it and have a quick look.
The project template already includes the storyboard and the custom classes. The table view controller is associated with AirDropTableViewController, while the detail view controller is connected with DetailViewController. The DetailViewController object simply makes use of WKWebView to display the file content. What we are going to do is add a Share button in the detail view to activate AirDrop.
Note: If you forgot how to use WKWebView, please refer to chapter 23 of the beginner book.Let's get started.
Adding a Share Button in Interface Builder
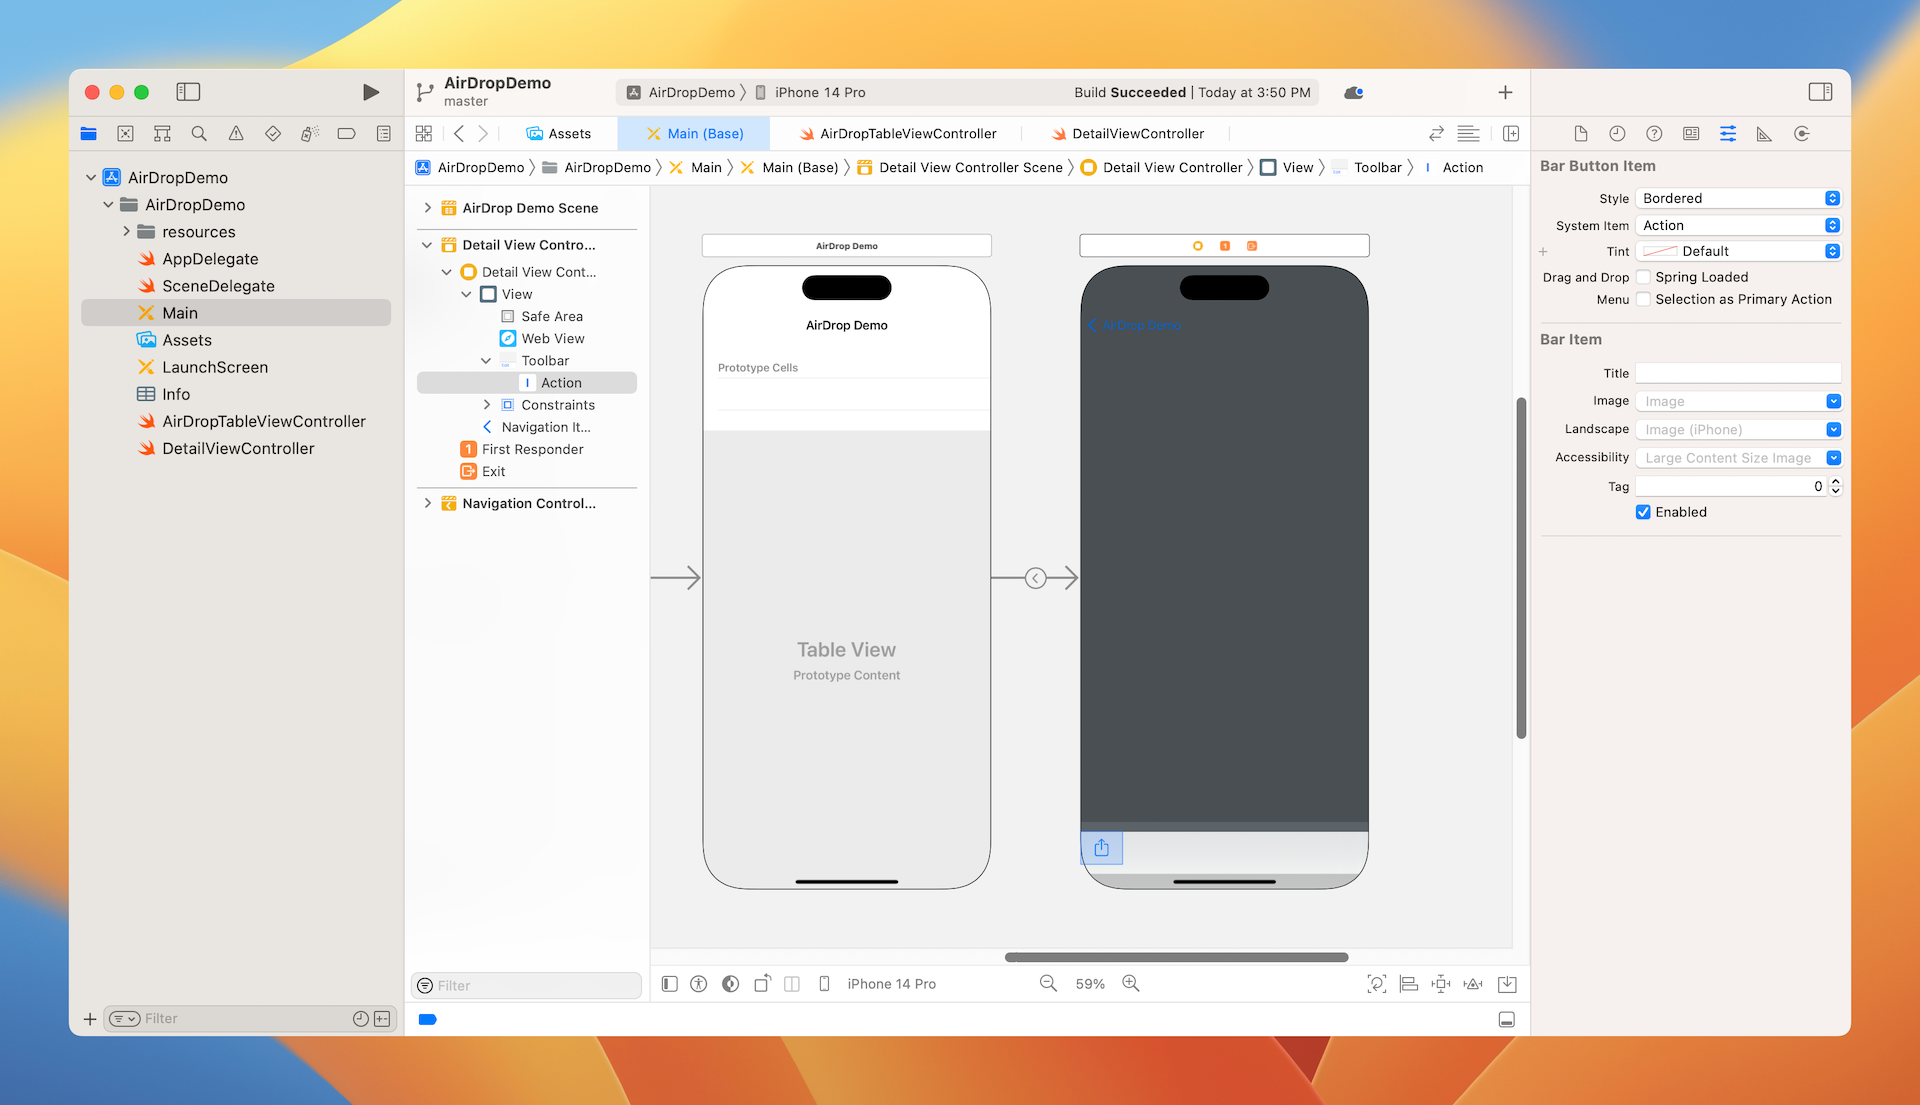
First, let's go to the storyboard. Drag a toolbar from the Object library to the detail view controller and place it at the bottom part of the controller. Select the default bar button item and change its identifier to Action in the Attributes inspector. Your screen should look like this:
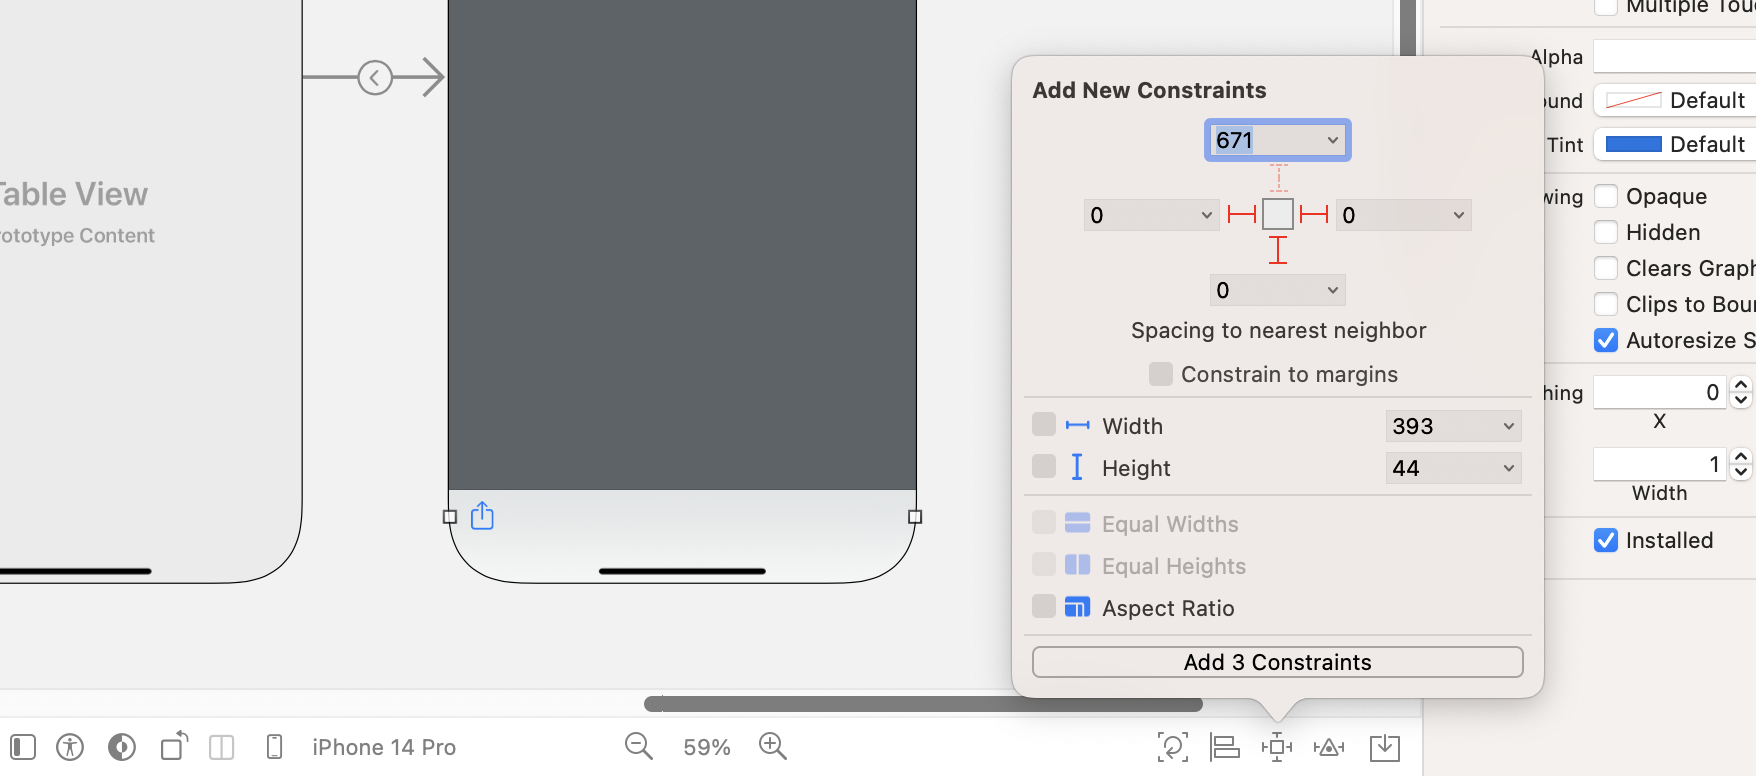
Next, you'll need to add some layout constraints for the toolbar, otherwise, it will not be properly displayed on some devices. Now, select the toolbar. In the auto layout bar, click the Add new constraints button to add some spacing constraints. Set the spacing value to 0 for the left, right and bottom sides. Also, uncheck the Constrain to margins checkbox. Click Add 3 Constraints to add the space constraints.
The newly-added constraints ensure the toolbar is always displayed at the bottom part of the view controller. Now go back to DetailViewController.swift and add an action method for the Share action:
@IBAction func share(sender: AnyObject) {

}
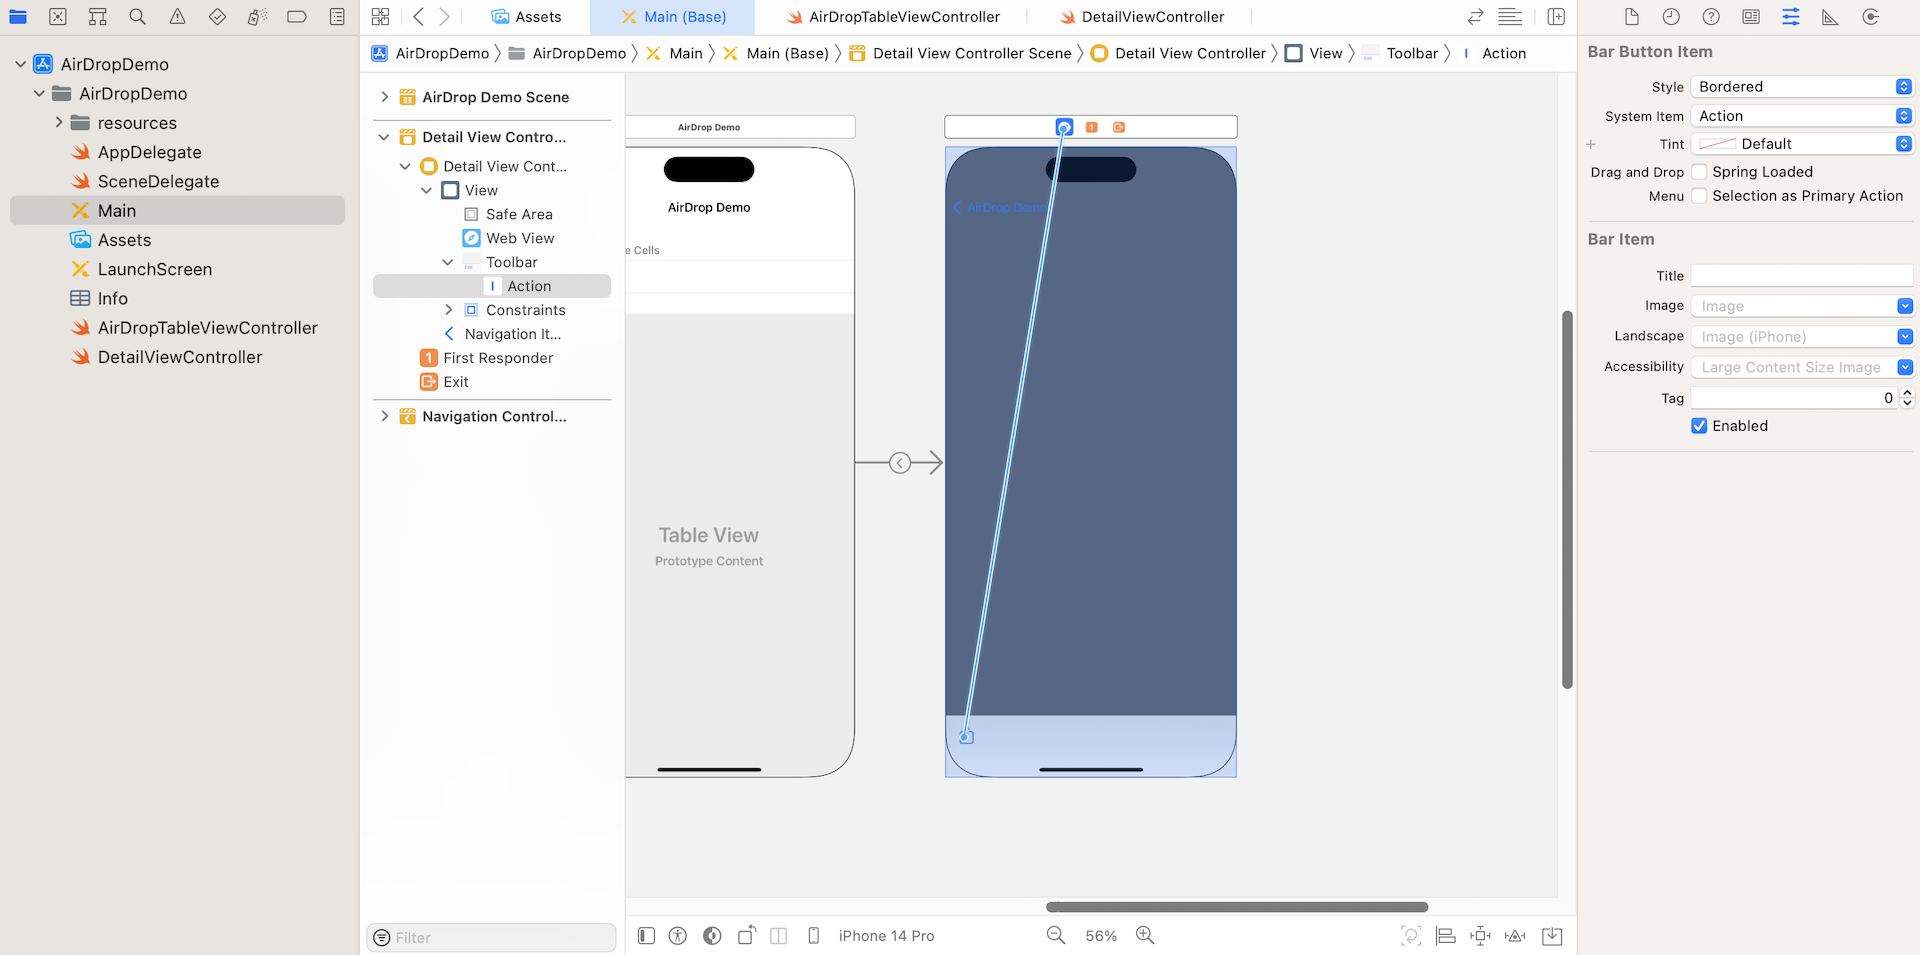
Go back to Main storyboard and connect the Share button with the action method. Control-drag from the Share button to the view controller icon of the scene dock, and select shareWithSender: from the pop-up menu.
Implementing AirDrop for File Sharing
Now that you have completed the UI design, we will move on to the coding part. Update the share method of the DetailViewController class to the following:
@IBAction func share(sender: AnyObject) {
    if let fileURL = fileToURL(file: filename) {
        let objectsToShare = [fileURL]
        let activityController = UIActivityViewController(activityItems: objectsToShare, applicationActivities: nil)
        let excludedActivities = [UIActivity.ActivityType.postToFlickr, UIActivity.ActivityType.postToWeibo, UIActivity.ActivityType.message, UIActivity.ActivityType.mail, UIActivity.ActivityType.print, UIActivity.ActivityType.copyToPasteboard, UIActivity.ActivityType.assignToContact, UIActivity.ActivityType.saveToCameraRoll, UIActivity.ActivityType.addToReadingList, UIActivity.ActivityType.postToFlickr, UIActivity.ActivityType.postToVimeo, UIActivity.ActivityType.postToTencentWeibo]

        activityController.excludedActivityTypes = excludedActivities

        present(activityController, animated: true, completion: nil)
    }
}
The code above should be very familiar to you; we discussed it at the very beginning of the chapter. The code creates an instance of UIActivityViewController, excludes some of the activities (e.g. print / assign to contact) and presents the controller on the screen. The tricky part is how you define the objects to share.
The filename property of DetailViewController contains the file name to share. We need to first find the full path of the file before passing it to the activity view controller. In the project template, I already include a helper method for this purpose:
func fileToURL(file: String) -> URL? {
    // Get the full path of the file
    let fileComponents = file.components(separatedBy: ".")

    if let filePath = Bundle.main.path(forResource: fileComponents[0], ofType: fileComponents[1]) {
        return URL(fileURLWithPath: filePath)
    }

    return nil
}
The code is very straightforward. For example, the image file glico.jpg will be transformed to:
file:///Users/simon/Library/Developer/CoreSimulator/Devices/7DC35502-54FD-447B-B10F-2B7B0FD5BDDF/data/Containers/Bundle/Application/01827504-4247-4C81-9DE5-02BEAE94C7E5/AirDropDemo.app/glico.jpg
The file URL varies depending on the device you're running. But the URL should begin with the file:// protocol. With the file URL object, we create the corresponding array and pass it to UIActivityViewController for AirDrop sharing.
Build and Run the AirDrop Demo
That's all you need to implement AirDrop sharing. You're now ready to test the app. Compile and run it on a real iPhone. Yes, you need a real device to test AirDrop sharing; the sharing feature will not work in a simulator. Furthermore, you need to have at least two iOS devices or a Mac to test the sharing feature.
Once you launch the app, select a file, tap the Share action button, and enable AirDrop. Make sure the receiving device has AirDrop enabled. The app should recognize the receiving device for file transfer.
Working with iPad
If you run the demo app on iPad and try to activate the Share action, you will end up with the following error:
2023-11-31 13:19:25.668204+0800 AirDropDemo[26143:1495108] *** Terminating app due to uncaught exception 'NSGenericException', reason: 'UIPopoverPresentationController (<UIPopoverPresentationController: 0x15a616050>) should have a non-nil sourceView or barButtonItem set before the presentation occurs.'
On iPad, UIActivityViewController is presented as a popover instead of an action sheet. In this case, you have to specify either the source view or the source bar button item for the popover presentation controller. For our demo app, when the user taps the Share button, we want to present the popover from the button. To do that, create an outlet variable for the Share button in DetailViewController.swift and establish the connection in the Interface Builder:
@IBOutlet var actionButtonItem: UIBarButtonItem!
Next, go back to DetailViewController.swift. Insert the following code snippet right before calling present(activityController, animated: true, completion: nil) of the share(sender:) method:
if let popOverController = activityController.popoverPresentationController {
    popOverController.barButtonItem = actionButtonItem
}
When a device (e.g. iPad) uses popover for presenting UIActivityViewController, the popoverPresentationController property has a value. Therefore, we test if the property contains a value, and then set its barButtonItem property to the Share button.
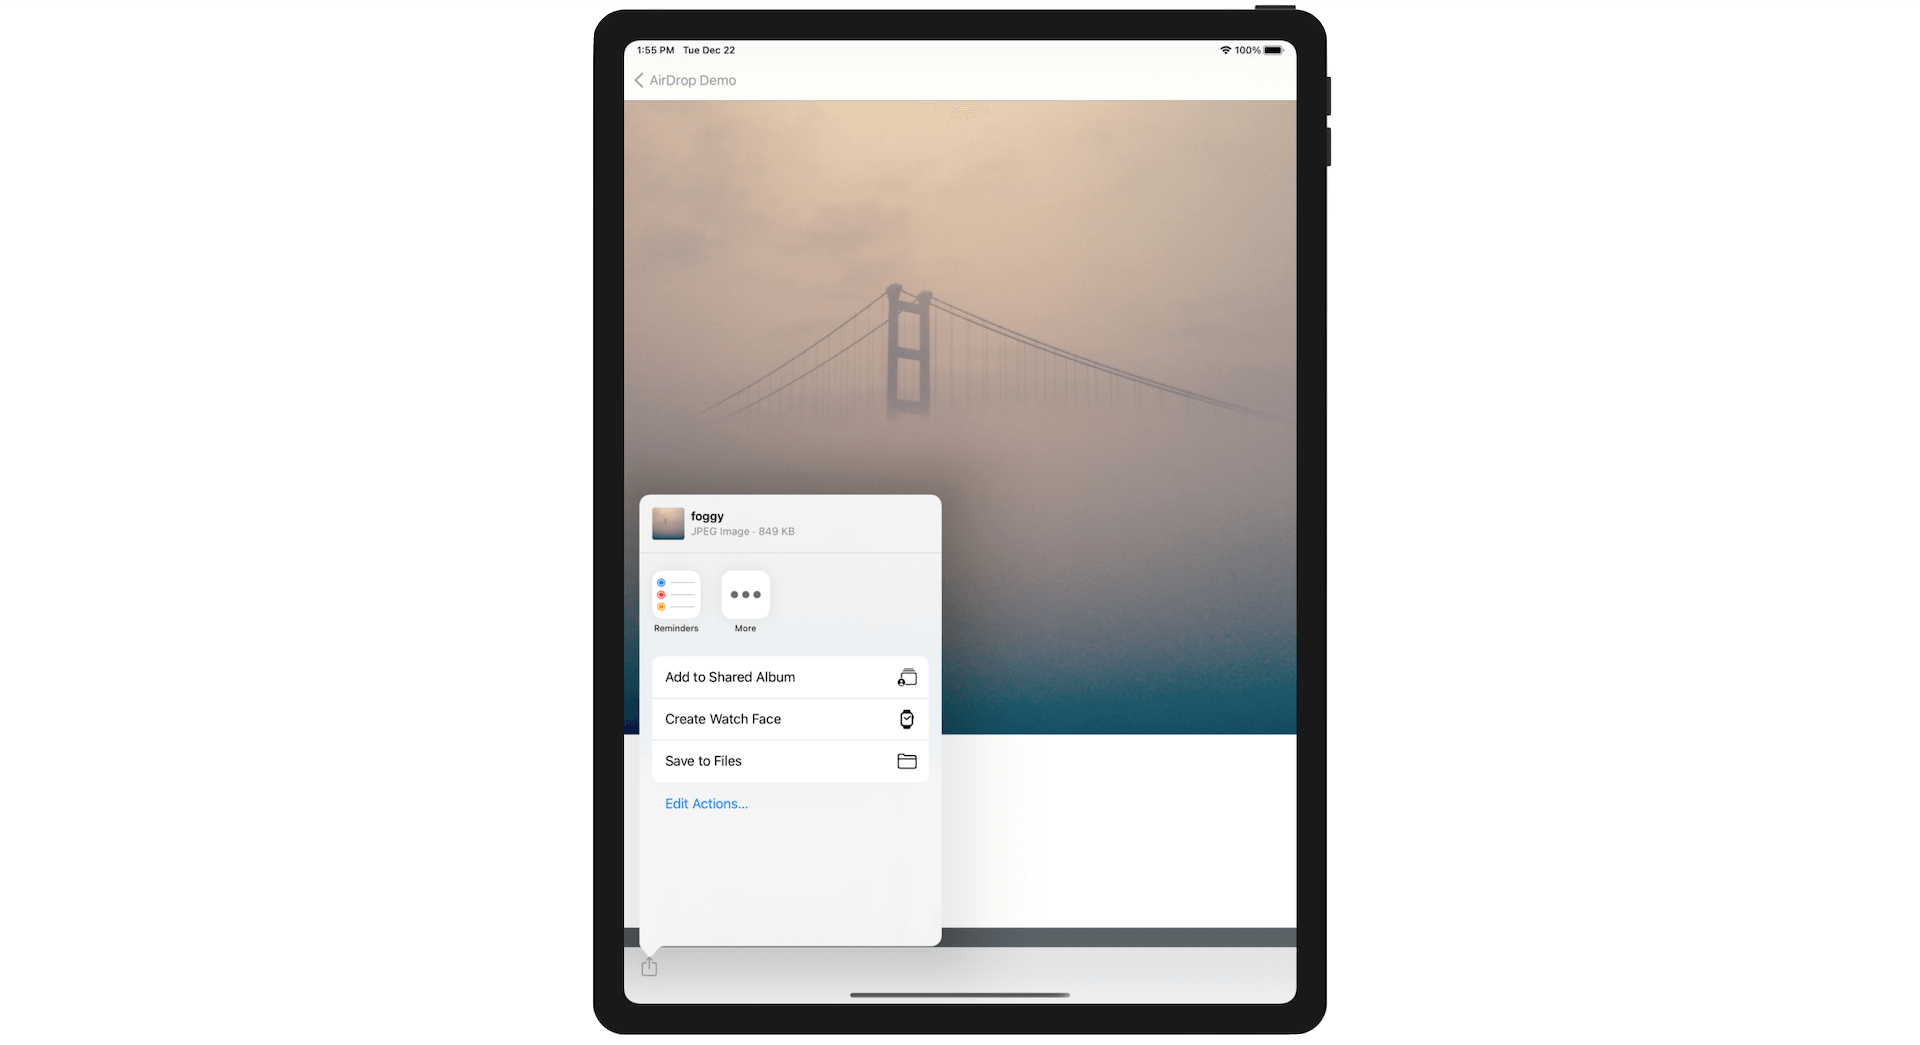
Now if you run the demo app on iPad, you will have something like this:
Uniform Type Identifiers
When you share an image with another iOS device, the receiving side automatically opens the Photos app and saves the image. If you transfer a PDF or document file, the receiving device may prompt you to pick an app for opening the file or open it directly in iBooks. How can iOS know which app to use for a particular data type?
UTIs (short for Uniform Type Identifiers) is Apple's answer to identifying data within the system. In brief, a uniform type identifier is a unique identifier for a particular type of data or file. For instance, com.adobe.pdf represents a PDF document and public.png represents a PNG image. You can find the full list of registered UTIs here:
An application that is capable of opening a specific type of file will be registered to handle that UTI with the iOS. So whenever that type of file is opened, iOS hands off that file to the specific app.
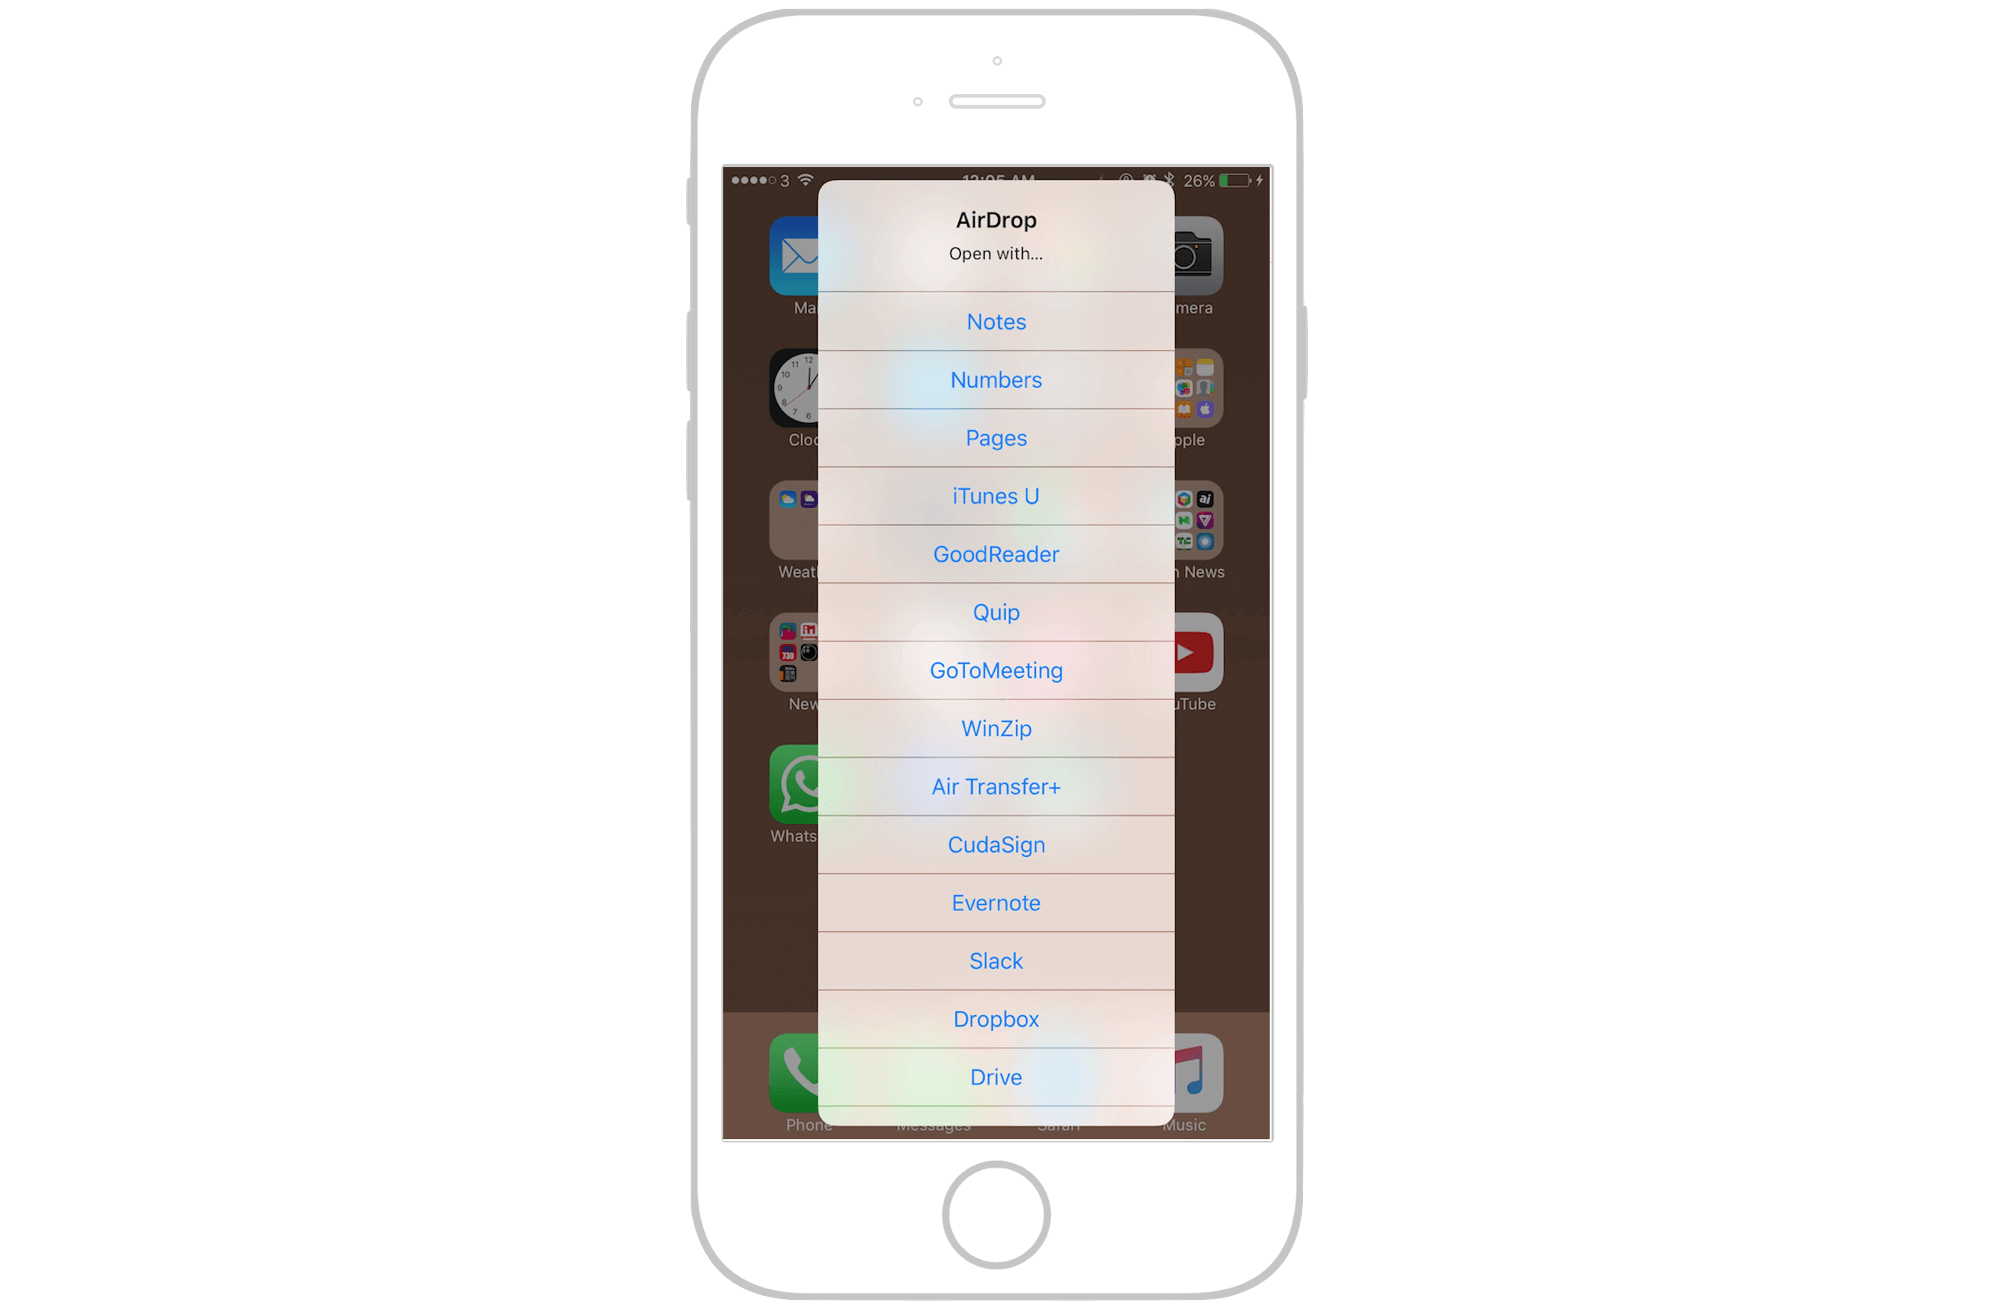
The system allows multiple apps to register the same UTI. In this case, iOS will prompt the user with the list of capable apps for opening the file. For example, when you share a document, the receiving device will prompt a menu for user's selection.
Summary
AirDrop is a very handy feature, which offers a great way to share data between devices. Best of all, the built-in UIActivityViewController has made it easy for developers to add AirDrop support in their apps. As you can see from the demo app, you just need a few lines of code to implement the feature. I highly recommend you to integrate this sharing feature into your app.
To continue reading and access the full version of the book, please get the full copy here. You will also be able to access the full source code of the project.