Chapter 41
Building AR Apps with ARKit and SpriteKit
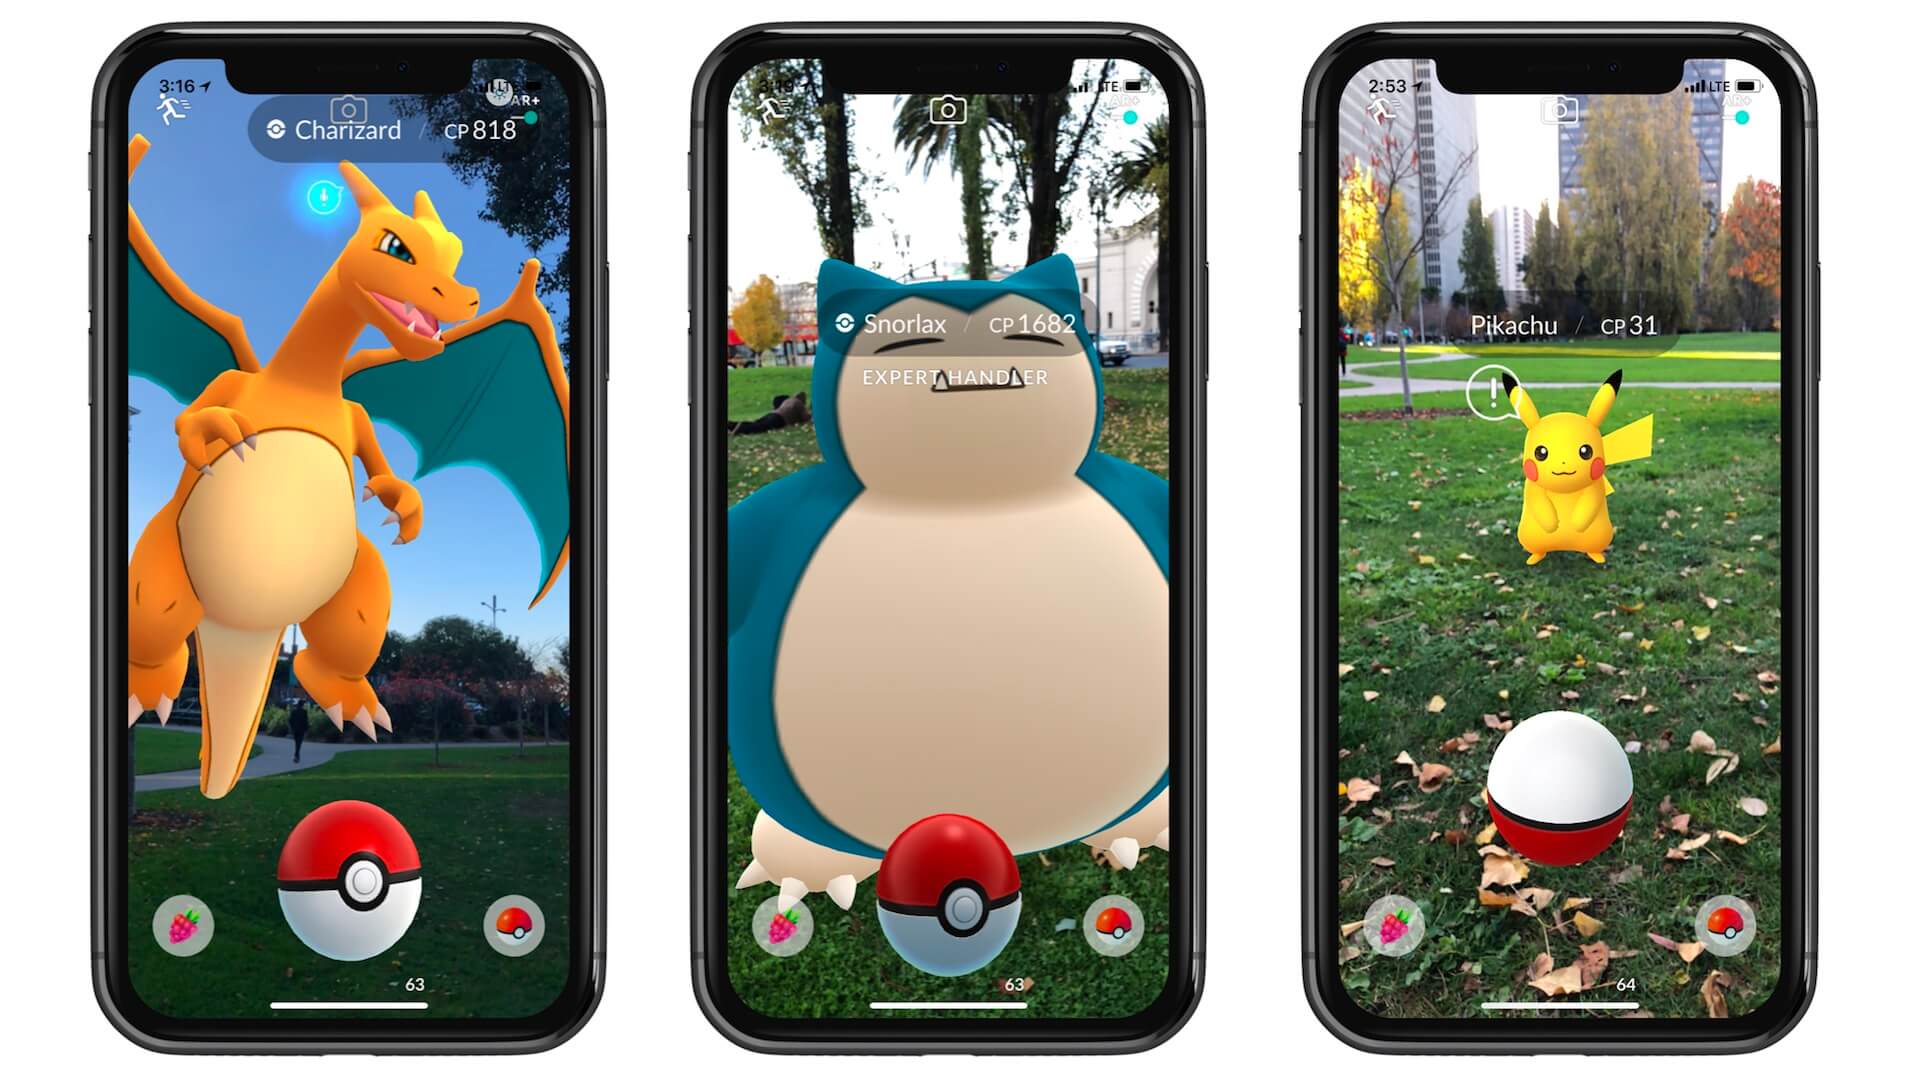
First things first, what is Augmented Reality? In brief, this means you can place virtual objects in a real-world environment. The very best example of AR application is Pokemon Go! At the time, this well-known game was not developed using ARKit, but it showcases one of the many applications of augmented reality.
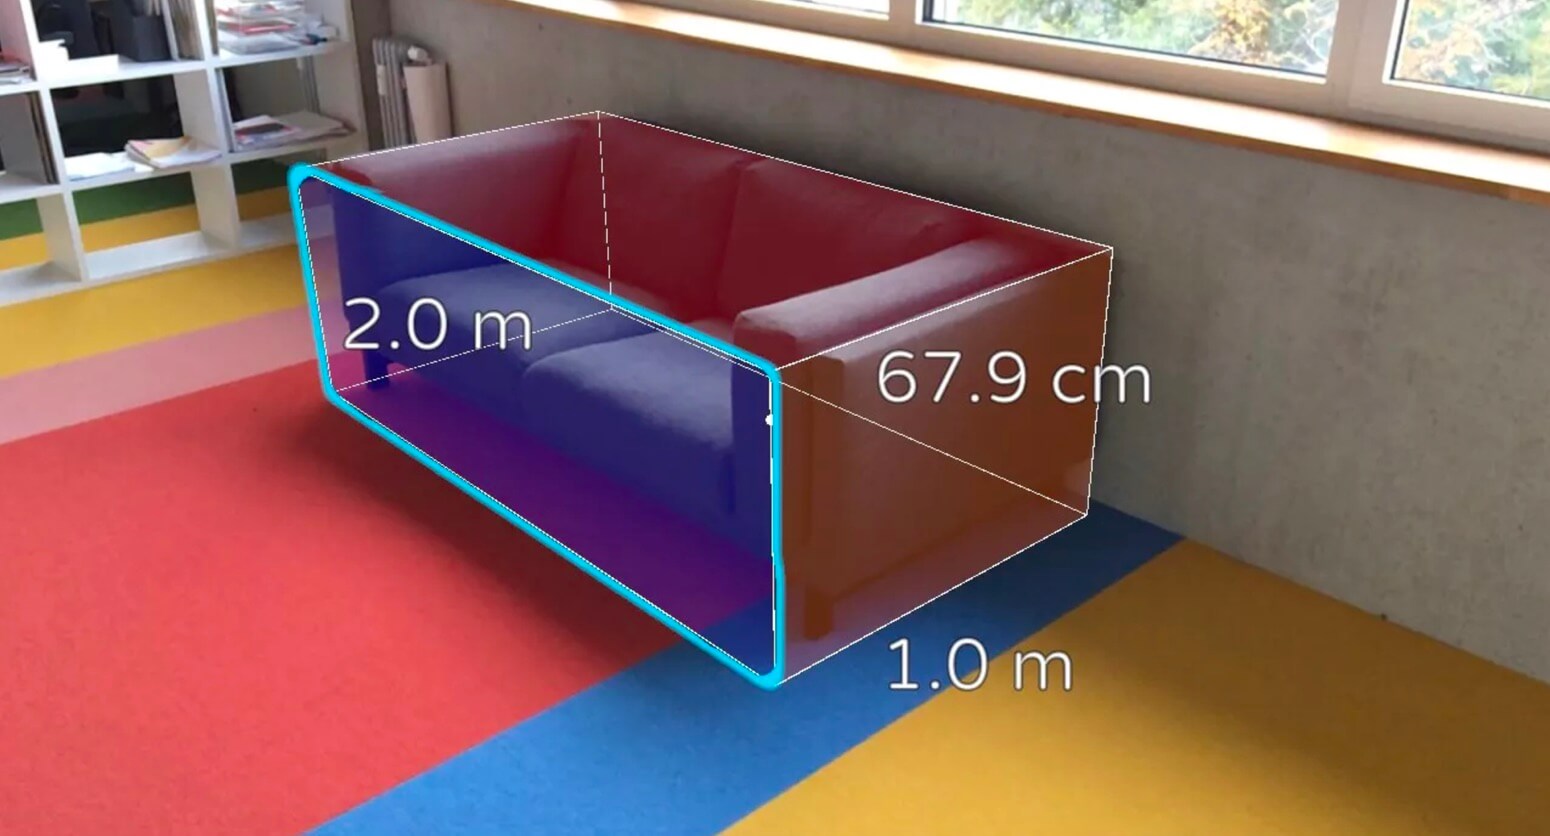
Another great example of AR application is the ARMeasure app (http://armeasure.com/) that allows users to measure nearly anything. You no longer need a physical ruler to measure an object, whether it's a suitcase or a photo frame hanging on a wall. Just point your iPhone's camera to the object you want to measure and the virtual ruler will do the measurement for you. If you haven't tried the app, I recommend you to check it out and play around with it.
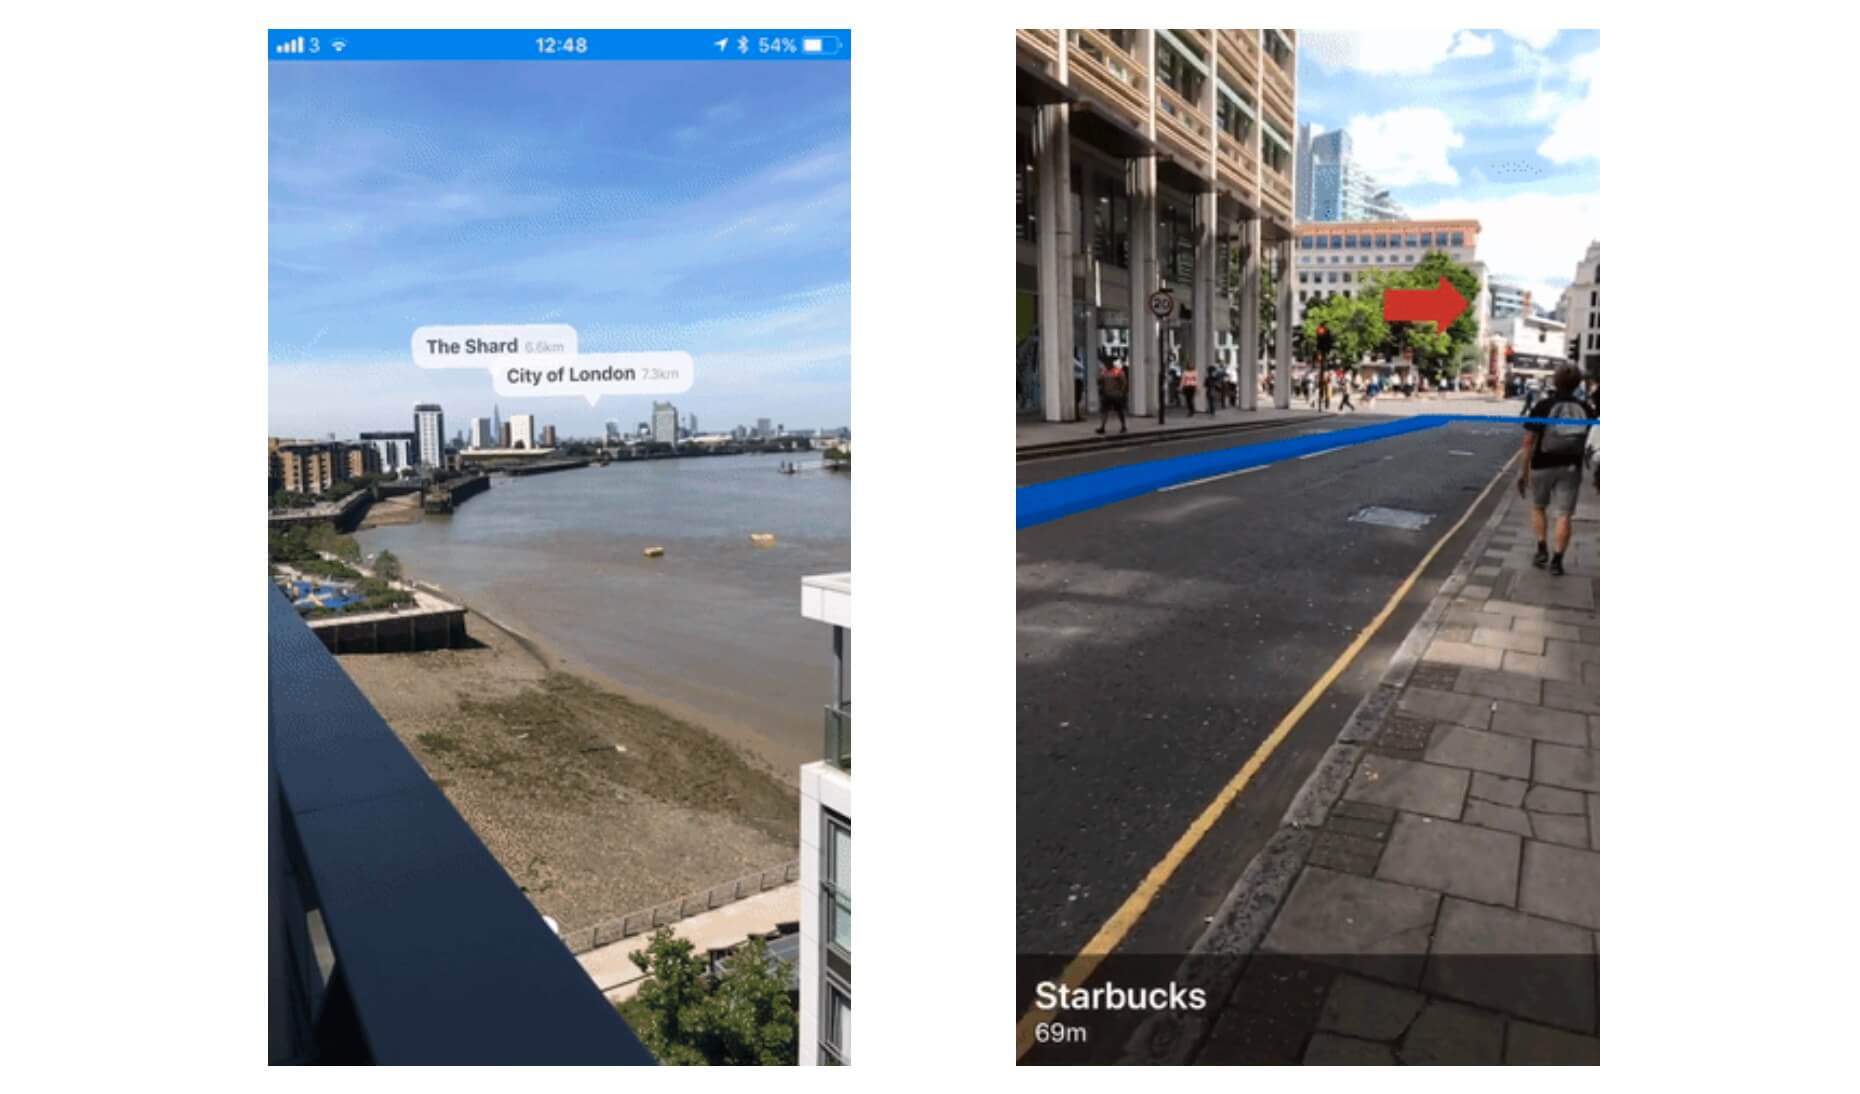
Amazing, right? There is no shortage of AR applications. Some AR applications integrate with other technologies to take the user experience to a whole next level. One example is the ARKit + CoreLocation application (https://github.com/ProjectDent/ARKit-CoreLocation), created by Andrew Hart.
While Google Maps or other map applications can show you the direction from point A to point B, the app demonstrates a whole different experience to show landmarks and directions by combining the power of AR and Core Location technologies. What's that building at the end of the street? Simply point the camera at that building, the app will give you the answer by annotating the landmark. Need to know how to get from here to there? The app shows you turn-by-turn directions displayed in augmented reality. Take a look at the figures below and check out the demo at https://github.com/ProjectDent/ARKit-CoreLocation. You will know what this app does and understand the power of combining AR and other technologies.
Note: Google launched a beta version of AR walking direction feature for Google Maps in August 2019. It's now called Live View in Google Maps.
Now that you have some basic ideas of AR, let's see how to build an AR app. We have already mentioned the term ARKit. The framework was first introduced in iOS 11 for building AR apps on iOS devices. Similar to all other frameworks, it comes along with Xcode. As long as you have Xcode installed, you will be able to develop ARKit apps.
Before we dive into ARKit, please take note that ARKit app can only run on the following devices, equipped with A9 processor (or up):
- iPhone 6s or later models
- iPad Pro, iPad mini (5th generation), iPad Air (3rd generation), and iPad (5th generation)
- iPhone SE
You can't test ARKit apps by using the built-in simulators. You have to use one of the compatible devices as listed above for testing. Therefore, try to prepare the device, otherwise, you can't test your app.
In this chapter, I'll give you a brief introduction to ARKit, which is the core framework for building AR apps on iOS. At the end of this chapter, you will walk away with a clear understanding of how ARKit works and how to accomplish the following using SpriteKit:
- Adding 2D objects into the real-world space
- Removing 2D objects from the space
- Interacting with virtual objects
Building Your First ARKit App
With the built-in template, Xcode has made it very easy for developers to create their first ARKit app. You don't even need to write a line of code. Let's have a try and you will understand what I mean in a minute.
Now fire up Xcode and choose to create a new project. In the project template, select the Augmented Reality App template.
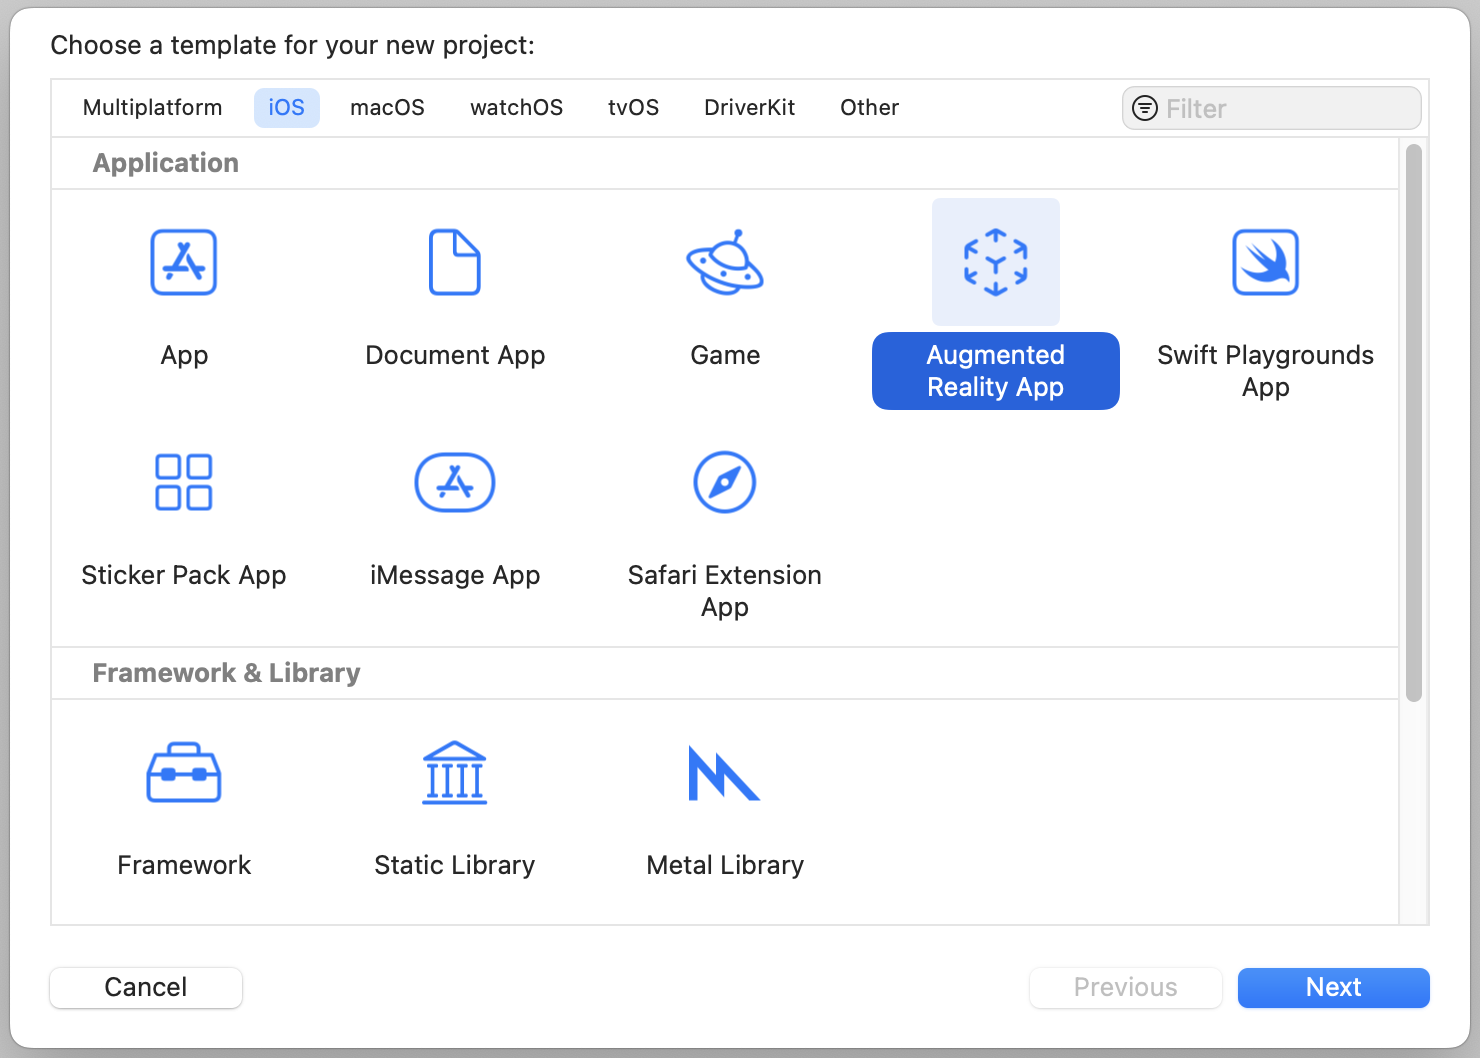
In the next screen, fill in the project information. You can name the product “ARKitDemo”, but please make sure you use an organization identifier different from mine. This is to ensure that Xcode generates an unique bundle identifier for you. For the Interface option, please choose Storyboard. The Content Technology option should be new to you. By default, it is set to SpriteKit.
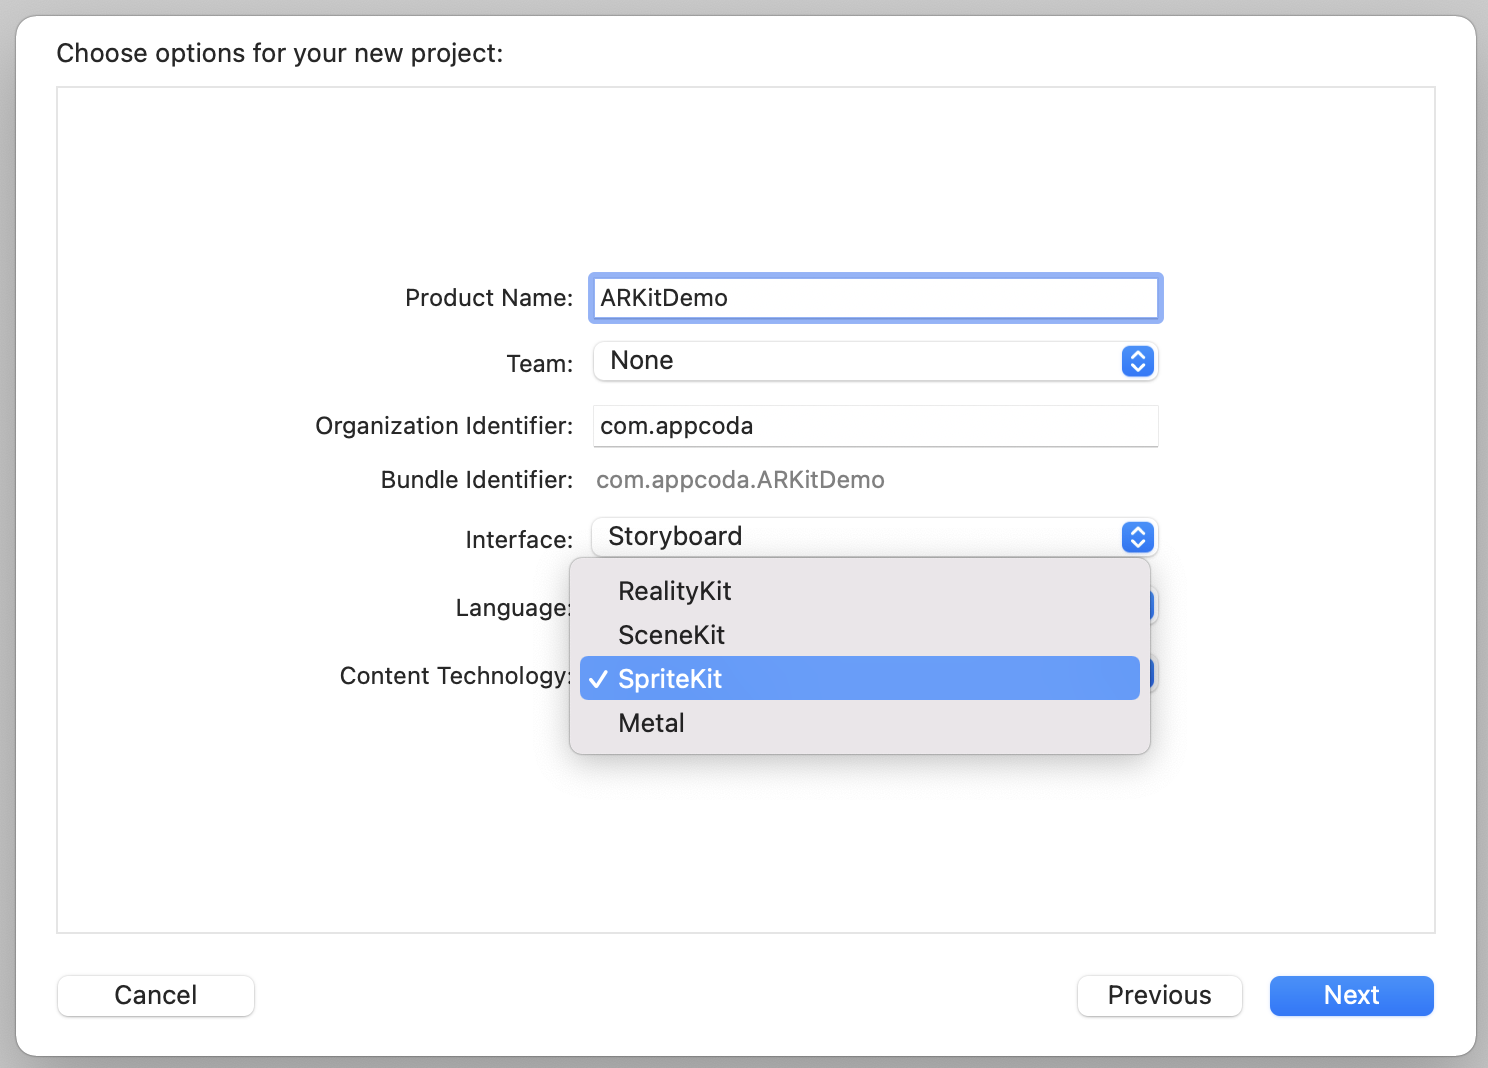
You probably have heard of SpriteKit, which is a framework for making 2D games, but wonder why is it here. Are we going to build a 2D game or an ARKit app?
One of the coolest things about ARKit is that it integrates well with Apple’s existing graphics rendering engines. SpriteKit is one of the rendering engines. You can also use SceneKit for rendering 3D objects or Metal for hardware-accelerated 3D graphics. For our first ARKit app, let's use SpriteKit as the content technology.
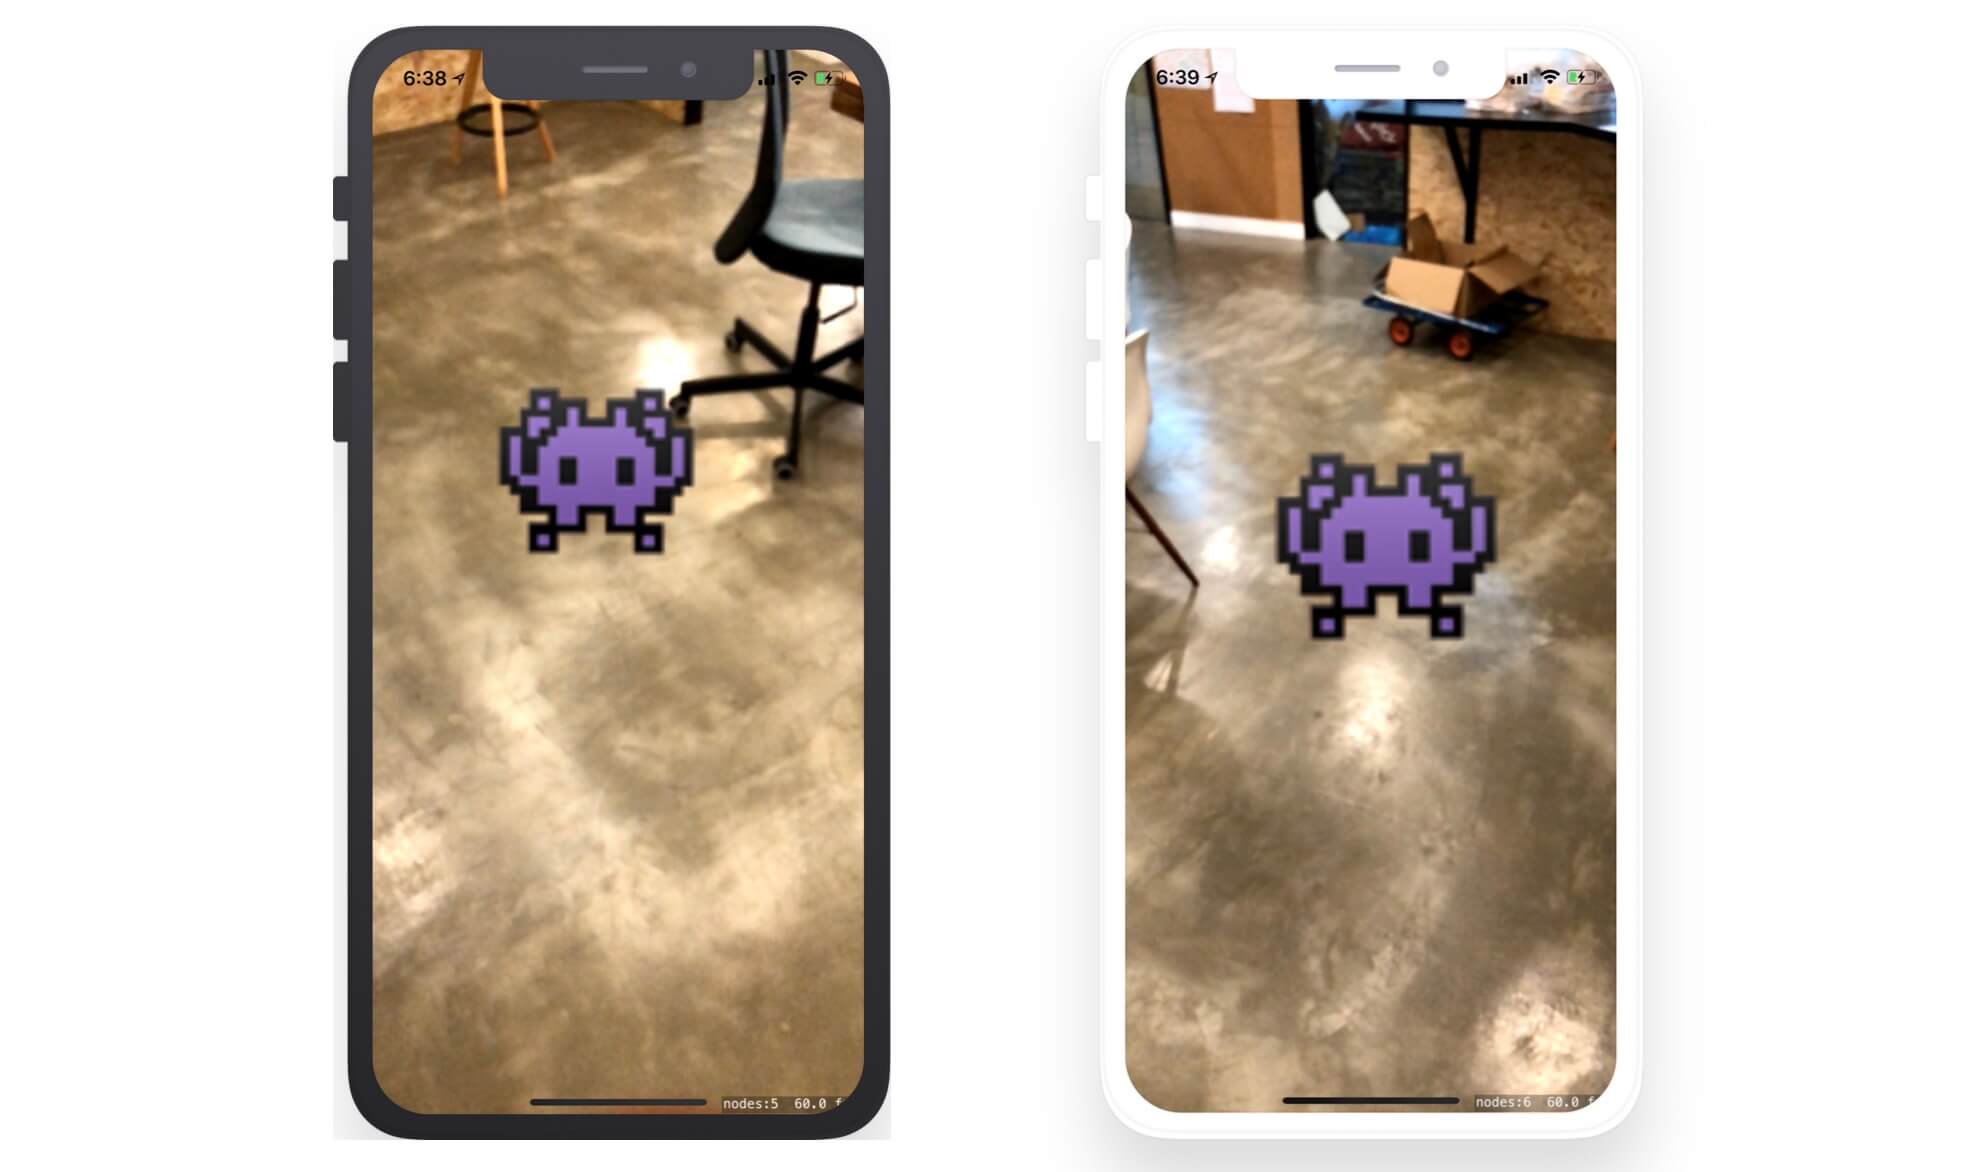
Once you save the project, you are ready to deploy the app to your iPhone. You don't need to change a line of code. The AR app template already generates the code you need for building your first ARKit app. Connect your iPhone to your Mac and hit the Run button to try out the ARKit app. It's a very simple app. Every time you tap on the screen, it displays an emoji character in augmented reality.
To continue reading and access the full version of the book, please get the full copy here. You will also be able to access the full source code of the project.