Chapter 41
Using ImageRenderer to Convert SwiftUI Views into Images

ImageRenderer is another new API for SwiftUI that came with iOS 16. It allows you to easily convert any SwiftUI views into an image. The implementation is straightforward. You instantiate an instance of ImageRenderer with a view for the conversion:

let renderer = ImageRenderer(content: theView)

You can then access the cgImage or uiImage property to retrieve the generated image.

As always, I love to demonstrate the usage of an API with an example. In Chapter 38, we built a line chart using the new Charts framework. Let's see how to let users save the chart as an image in the photo album and share it using ShareLink.

Revisit the Chart View

Figure 1. Line chart demo

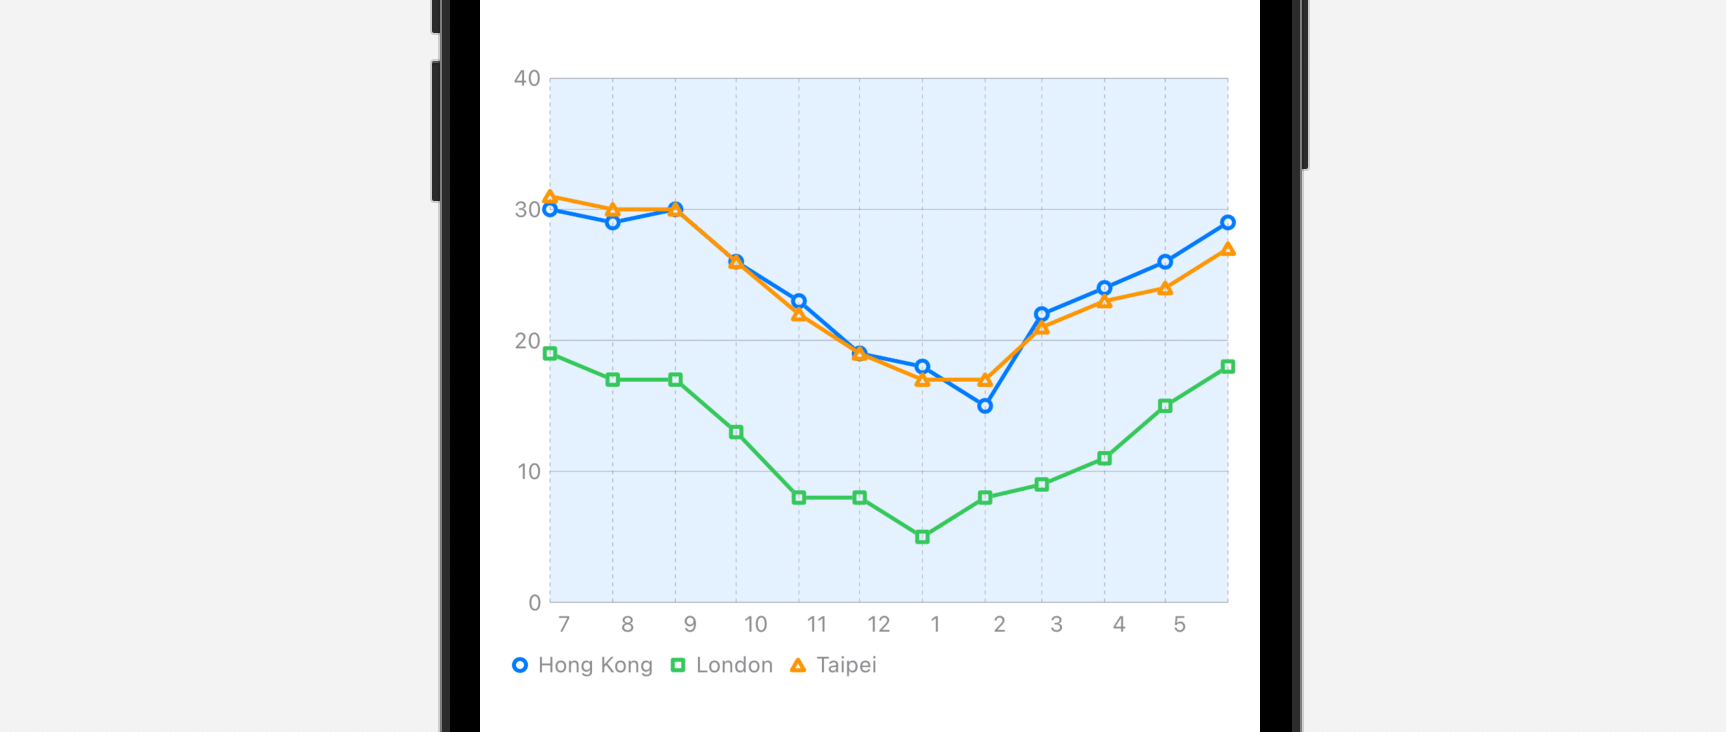
First, let's revisit the code of the ChartView example. We used the new API of the Charts framework to create a line chart and display the weather data. Here is the code snippet:

var body: some View {
    VStack {
        Chart {
            ForEach(chartData, id: \.city) { series in
                ForEach(series.data) { item in
                    LineMark(
                        x: .value("Month", item.date),
                        y: .value("Temp", item.temperature)
                    )
                }
                .foregroundStyle(by: .value("City", series.city))
                .symbol(by: .value("City", series.city))
            }
        }
        .chartXAxis {
            AxisMarks(values: .stride(by: .month)) { value in
                AxisGridLine()
                AxisValueLabel(format: .dateTime.month(.defaultDigits))

            }
        }
        .chartPlotStyle { plotArea in
            plotArea
                .background(.blue.opacity(0.1))
        }
        .chartYAxis {
            AxisMarks(position: .leading)
        }
        .frame(width: 350, height: 300)
        .padding(.horizontal)

    }
}

To follow this tutorial, you can first download the starter project from https://www.appcoda.com/resources/swiftui5/SwiftUIImageRendererStarter.zip. Before using ImageRenderer, let's refactor the code above in ContentView.swift into a separate view like this:

struct ChartView: View {
    let chartData = [ (city: "Hong Kong", data: hkWeatherData),
                      (city: "London", data: londonWeatherData),
                      (city: "Taipei", data: taipeiWeatherData)
    ]

    var body: some View {
        VStack {
            Chart {
                ForEach(chartData, id: \.city) { series in
                    ForEach(series.data) { item in
                        LineMark(
                            x: .value("Month", item.date),
                            y: .value("Temp", item.temperature)
                        )
                    }
                    .foregroundStyle(by: .value("City", series.city))
                    .symbol(by: .value("City", series.city))
                }
            }
            .chartXAxis {
                AxisMarks(values: .stride(by: .month)) { value in
                    AxisGridLine()
                    AxisValueLabel(format: .dateTime.month(.defaultDigits))

                }

            }
            .chartPlotStyle { plotArea in
                plotArea
                    .background(.blue.opacity(0.1))
            }
            .chartYAxis {
                AxisMarks(position: .leading)
            }
            .frame(width: 350, height: 300)

            .padding(.horizontal)

        }
    }
}

Next, we declare a variable in ContentView to hold the chart view:

var chartView = ChartView()

Converting the View into an Image using ImageRenderer

Now we are ready to convert the chart view into an image. To allow users to save the chart view image in the photo album, we will add a button named Save to Photos.

Let's implement the button like this:

var body: some View {

    VStack(spacing: 20) {
        chartView

        HStack {
            Button {
                let renderer = ImageRenderer(content: chartView)

                if let image = renderer.uiImage {
                    UIImageWriteToSavedPhotosAlbum(image, nil, nil, nil)
                }
            } label: {
                Label("Save to Photos", systemImage: "photo")
            }
            .buttonStyle(.borderedProminent)
        }
    }

}

In the closure of the button, we create an instance of ImageRenderer with chartView and retrieve the rendered image using the uiImage property. Then, we call UIImageWriteToSavedPhotosAlbum to save the image to the photo album.

Note: You need to add a key named Privacy - Photo Library Usage Description in the info.plist before the app can properly save an image to the built-in photo album.

Adding a Share Button

Figure 2. Adding a share button

In the previous chapter, you learned how to use ShareLink to present a share sheet for content sharing. With ImageRenderer, you can now easily build a function for users to share the chart view as an image.

For convenience purpose, let's refactor the code for image rendering into a separate method:

@MainActor
private func generateSnapshot() -> UIImage {
    let renderer = ImageRenderer(content: chartView)

    return renderer.uiImage ?? UIImage()
}

The generateSnapshot method converts the chartView into an image.

Note: If you are new to @MainActor, you can check out this article.

With this helper method, we can create a ShareLink like this in the VStack view:

ShareLink(item: Image(uiImage: generateSnapshot()), preview: SharePreview("Weather Chart", image: Image(uiImage: generateSnapshot())))
.buttonStyle(.borderedProminent)

Now when you tap the Share button, the app captures the line chart and lets you share it as an image.

Figure 3. Displaying the share sheet

Adjusting the Image Scale

You may notice that the resolution of the rendered image is a bit low. The ImageRenderer class has a property named scale that you can adjust to change the scale of the rendered image. By default, its value is set to 1.0. To generate an image with a higher resolution, you can set it to 2.0 or 3.0. Alternatively, you can set the value to the scale of the screen:

renderer.scale = UIScreen.main.scale

Summary

The ImageRenderer class has made it very easy to convert any SwiftUI views into an image. If your app supports iOS 16 or later, you can use this new API to create convenient features for your users. Besides rendering images, ImageRenderer also allows you to render a PDF document. For further details, you can refer to the official documentation.

To access the full content and the complete source code, please get your copy at https://www.appcoda.com/swiftui.

results matching ""

    No results matching ""